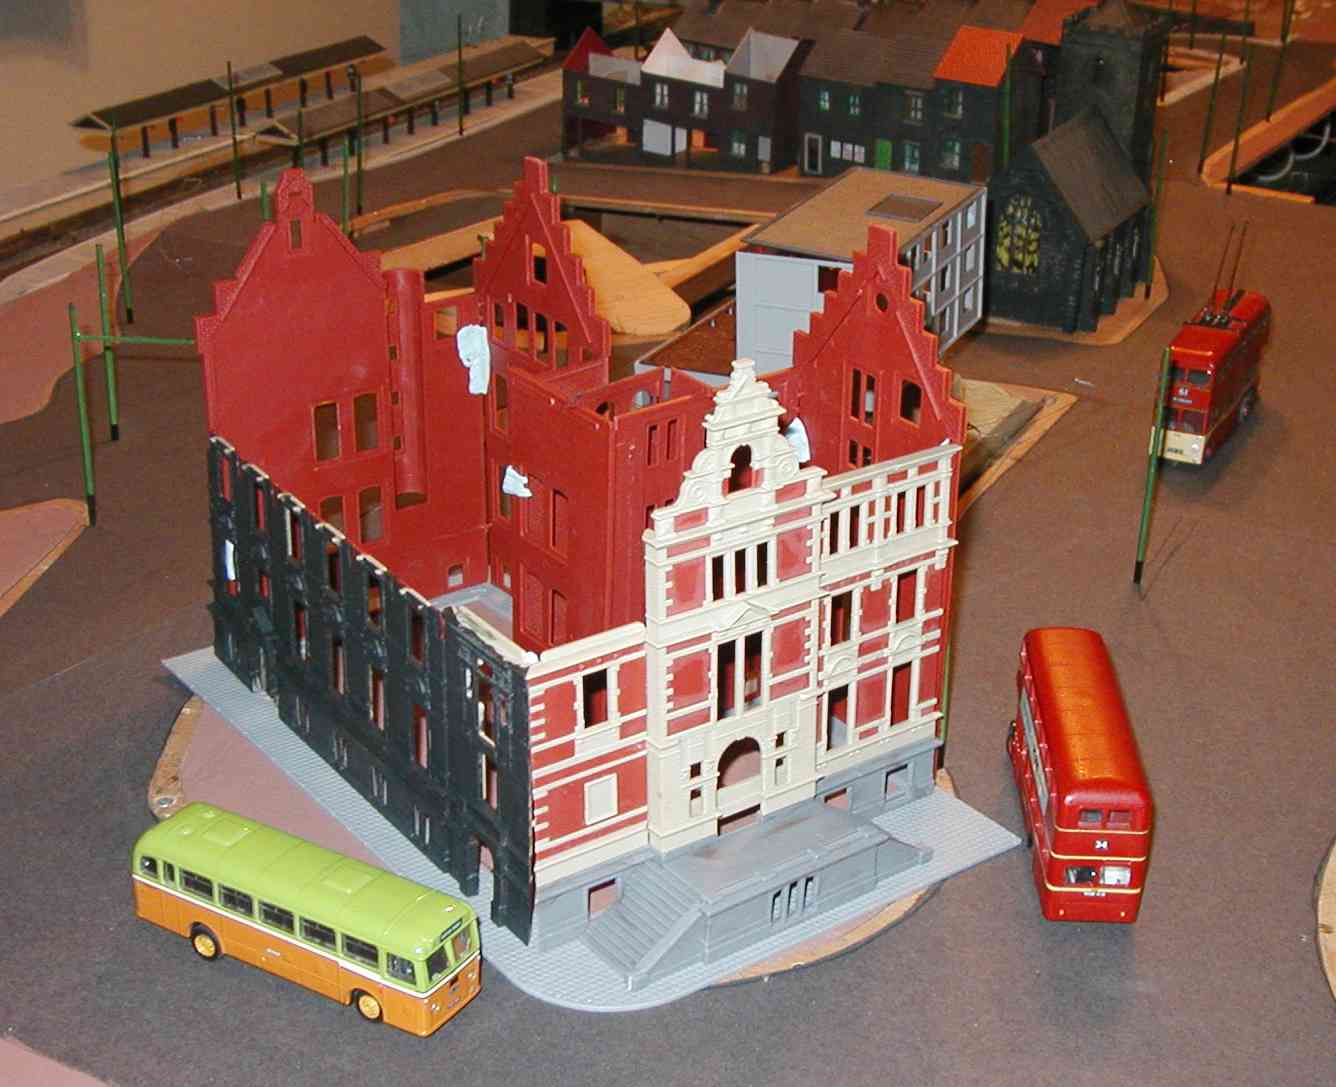
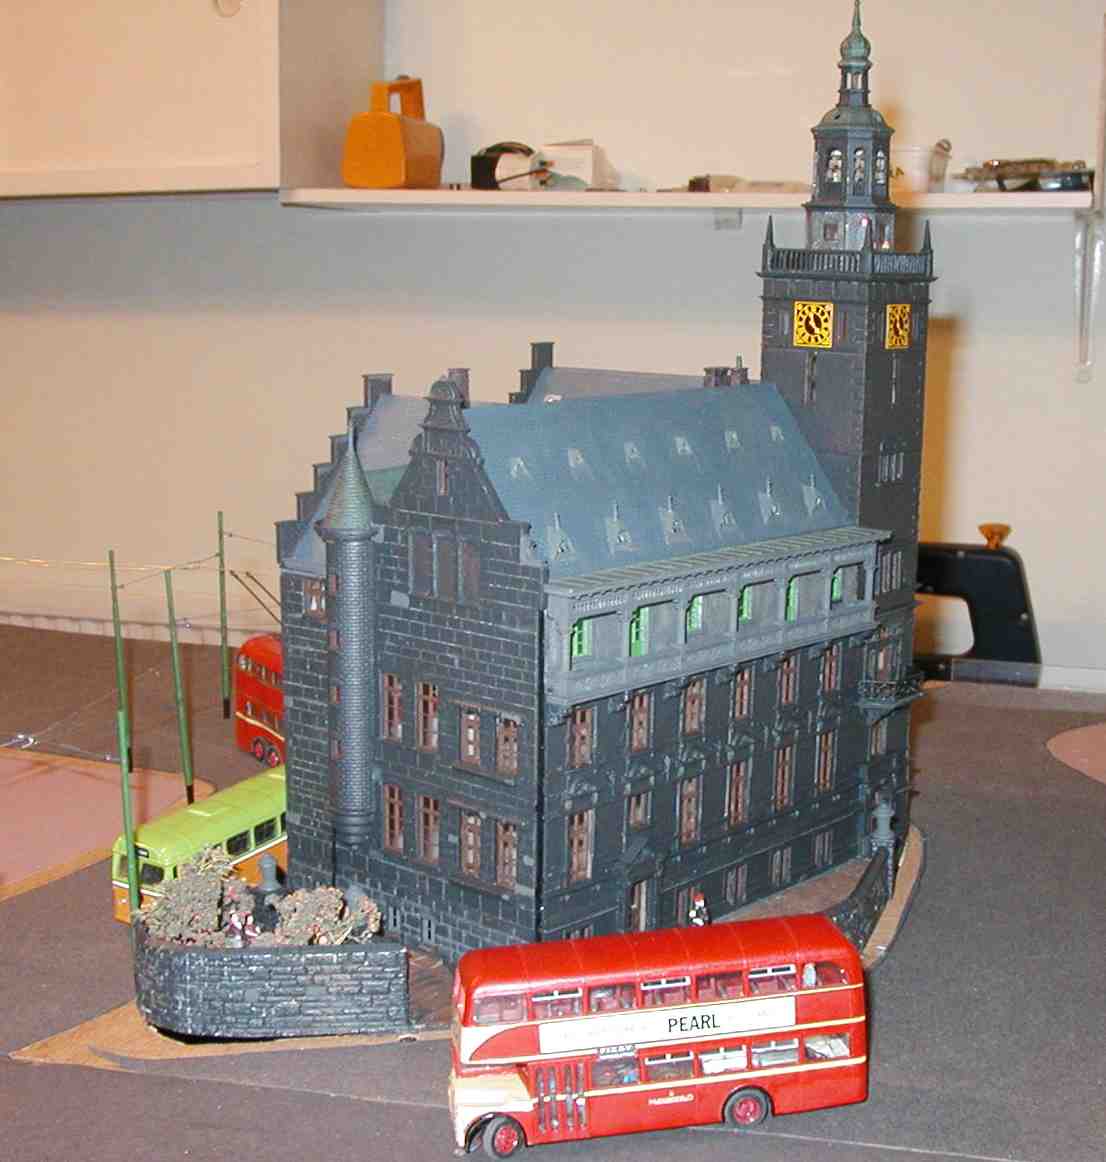
The Town Hall (which emulates Bradford City Hall) mocked up to check for fit after shortening some of the sides. The main entrance wall is coloured as delivered in the kit, but the long decorative side on the left was experimentally blackened to see if this matched the pictures of town centre buildings of the time.

Disappointingly, for such an ornate and colourful kit, this is exactly what public buildings looked like in the 1960's before smokeless zone legislation and stone-cleaning, so the whole building would have to be the darkened in the same way. Here is the main entrance side again, treated as such, and the steps reduced to one side only.
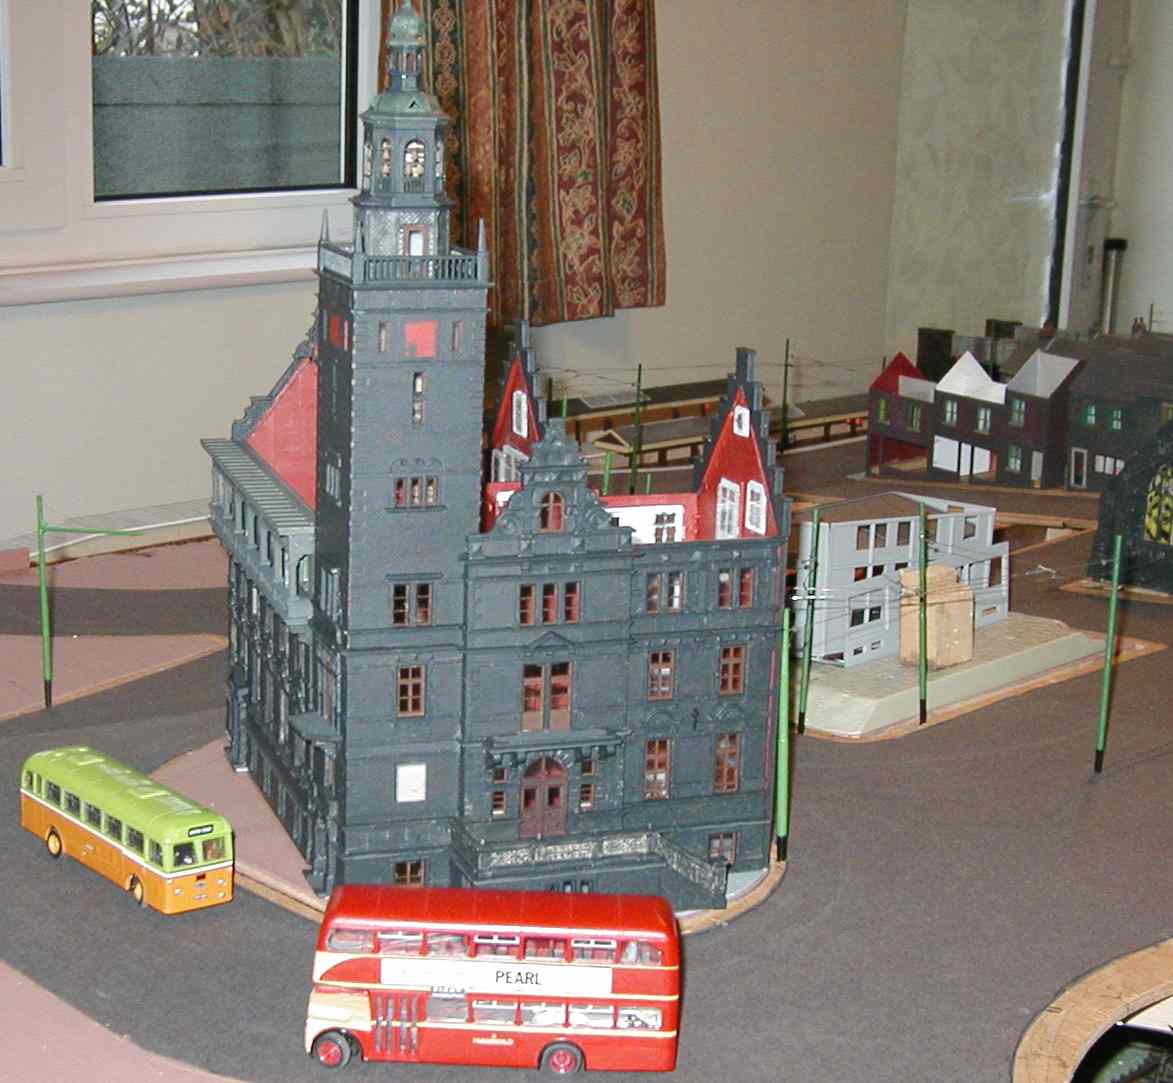
The Town Hall would boast a tall clock tower when completed, and I anticipated a quite magnificent building. The detail on this kit is tremendous! This end was changed from brick to stone to be more in keeping with the area.
Also in shot is the skeleton of a flats and shops building in position to check its look. These would eventually have to be built-in to the slope of the layout.
The tower makes an appearance, followed by the roof and other small details (picture on the right >)
The finished article. Very impressive, and complements the town scene very well at this end of the layout. (>>)
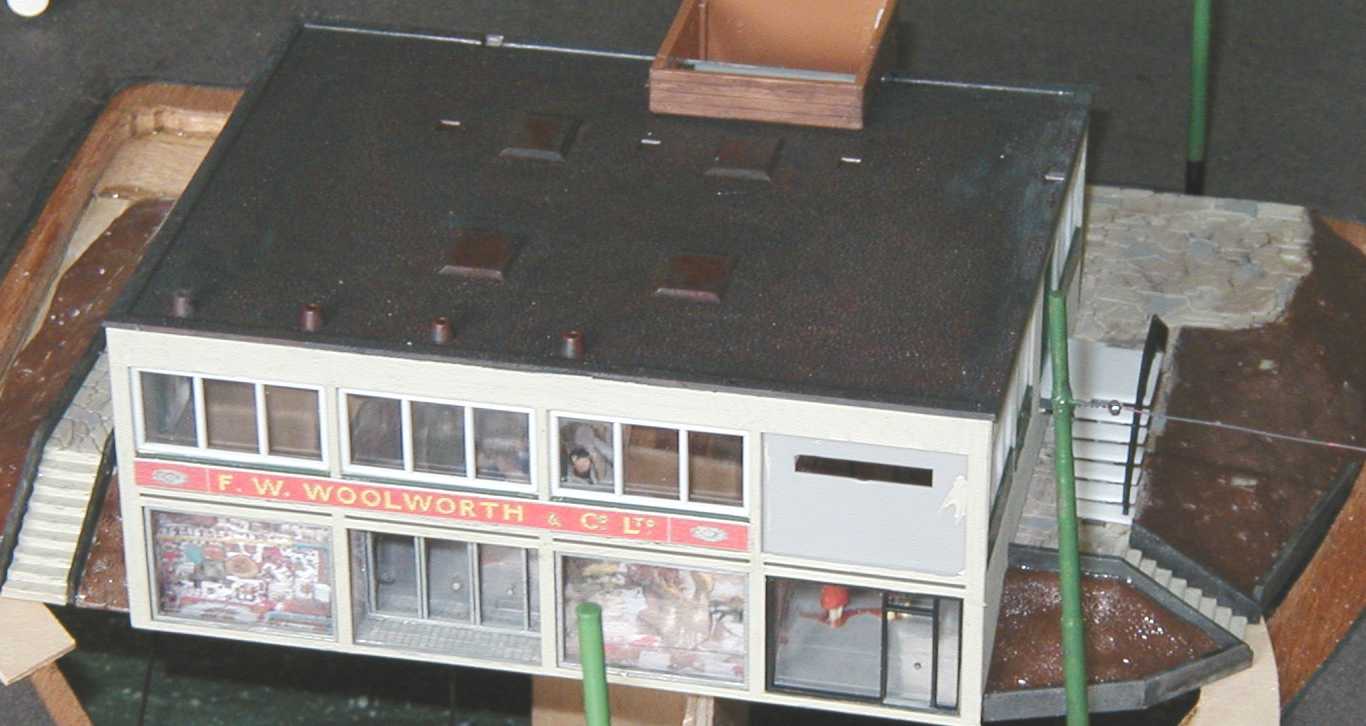
The block of flats and shops started. Here is the shop part underneath just prior to finishing. The kit has been converted from multiple units to a large Woolworth's store and a Boots at the right-hand end. (>>)

The flats section almost built.

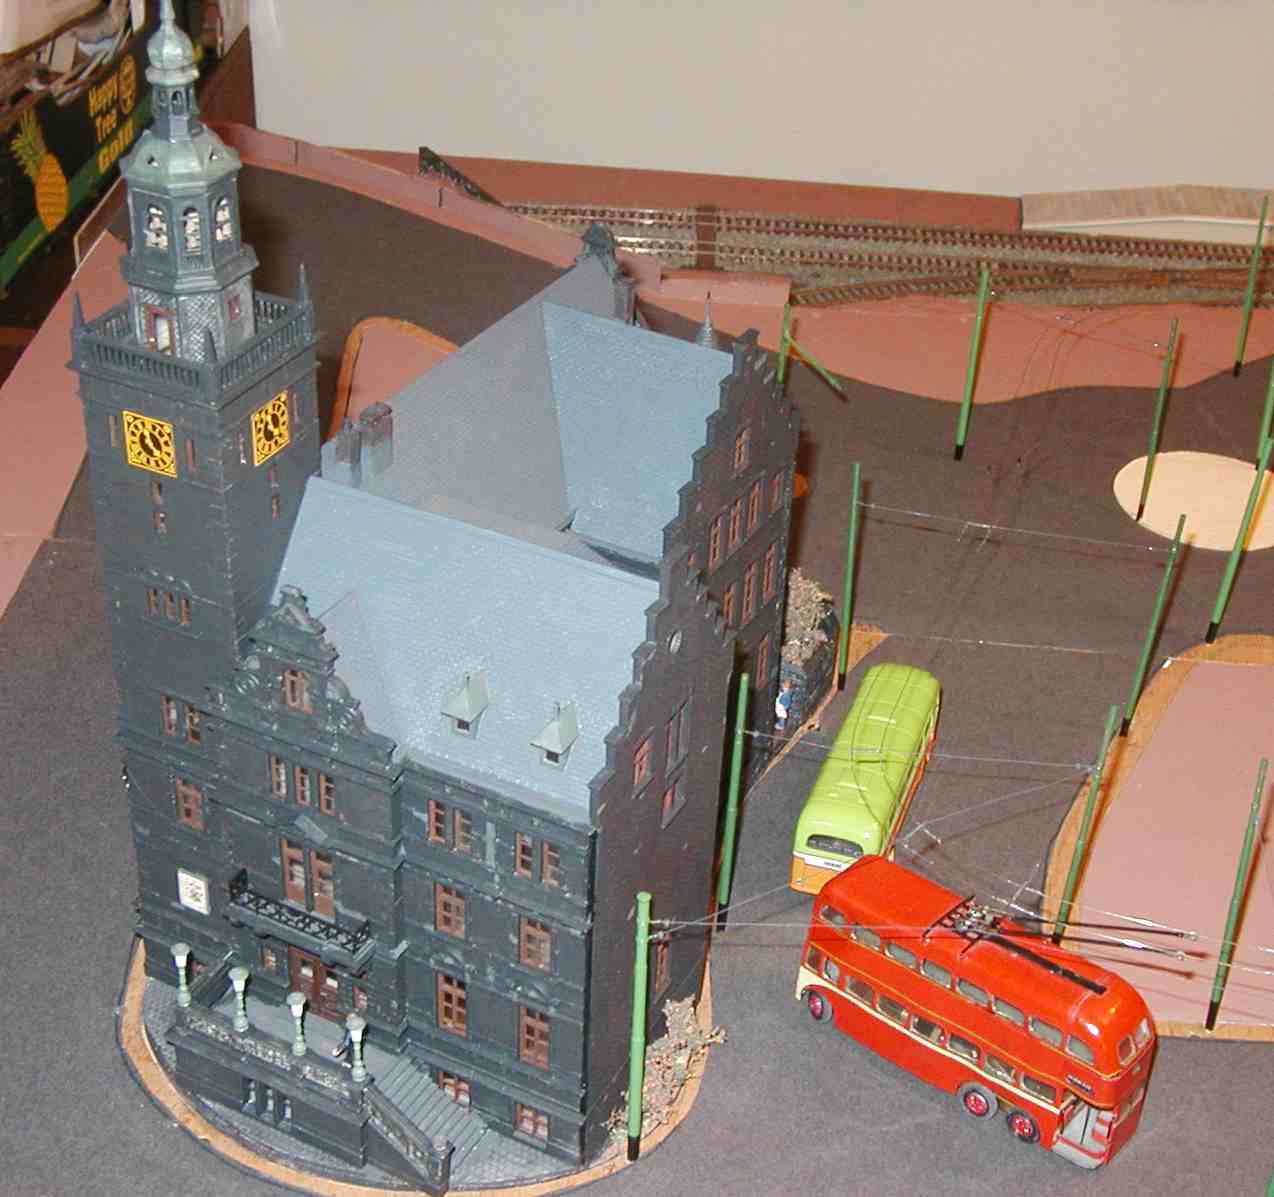
The finished block installed on the layout, complete with scenery, people and a car park. These views also shows the overhead at this end. (>>)
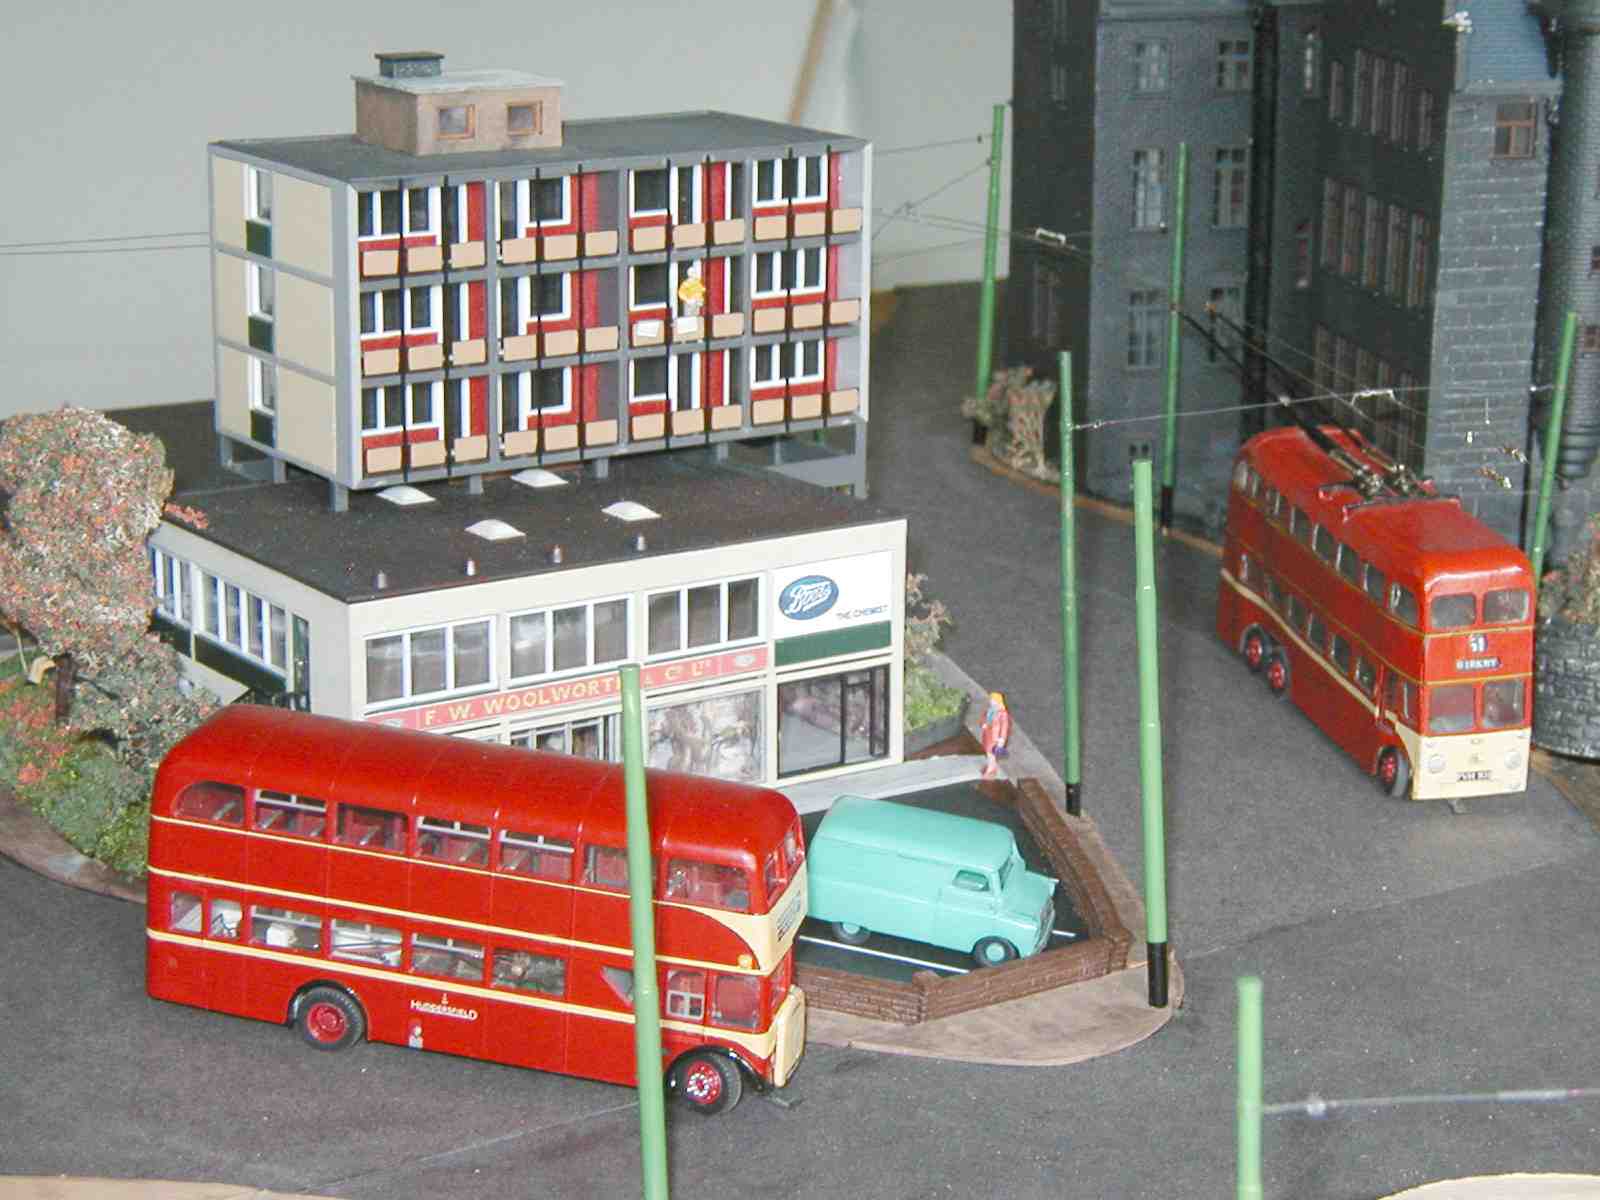
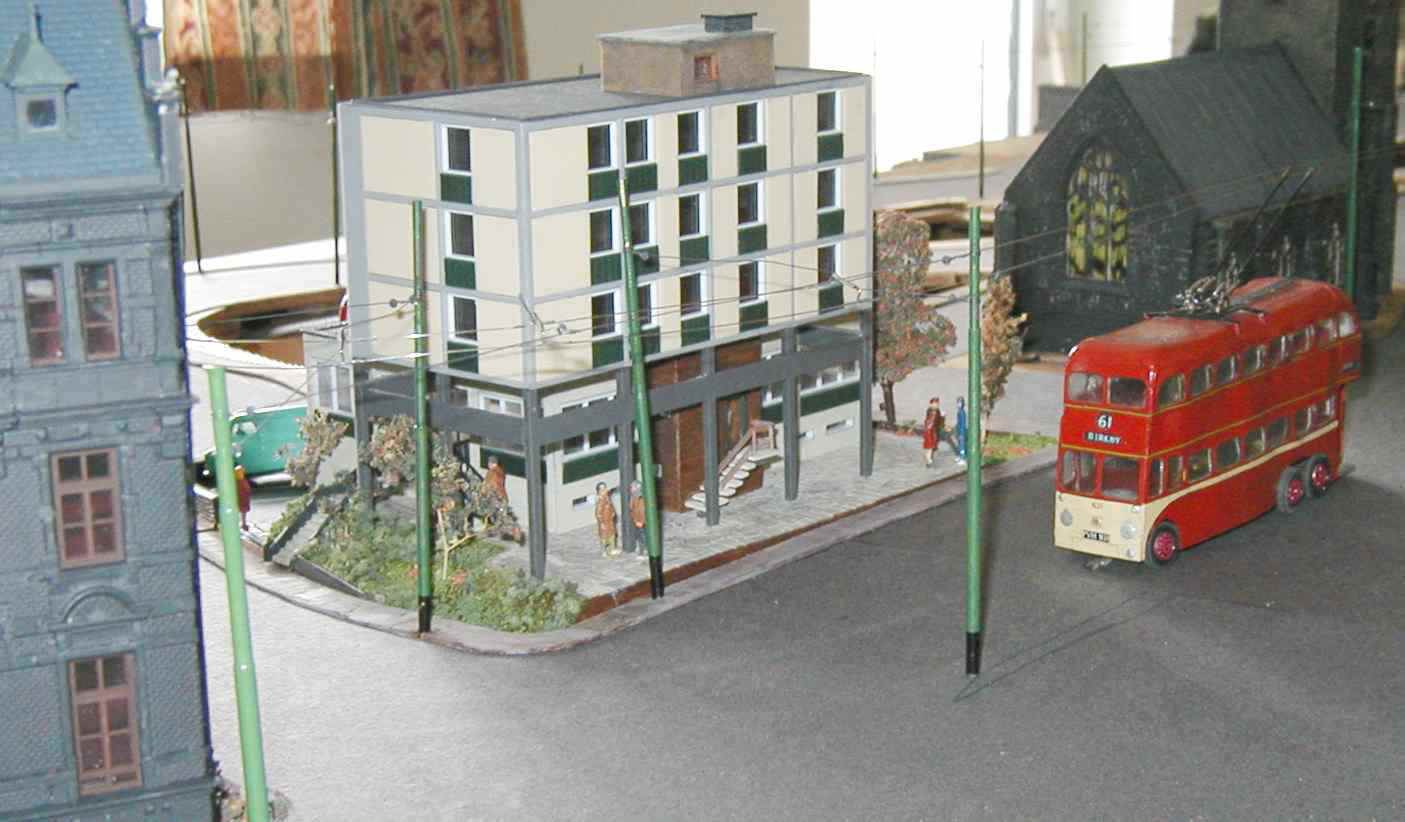
Two more views. From the front (on the left) and from the rear (above), the latter showing the block of flats on its pillars. A church is in the background.
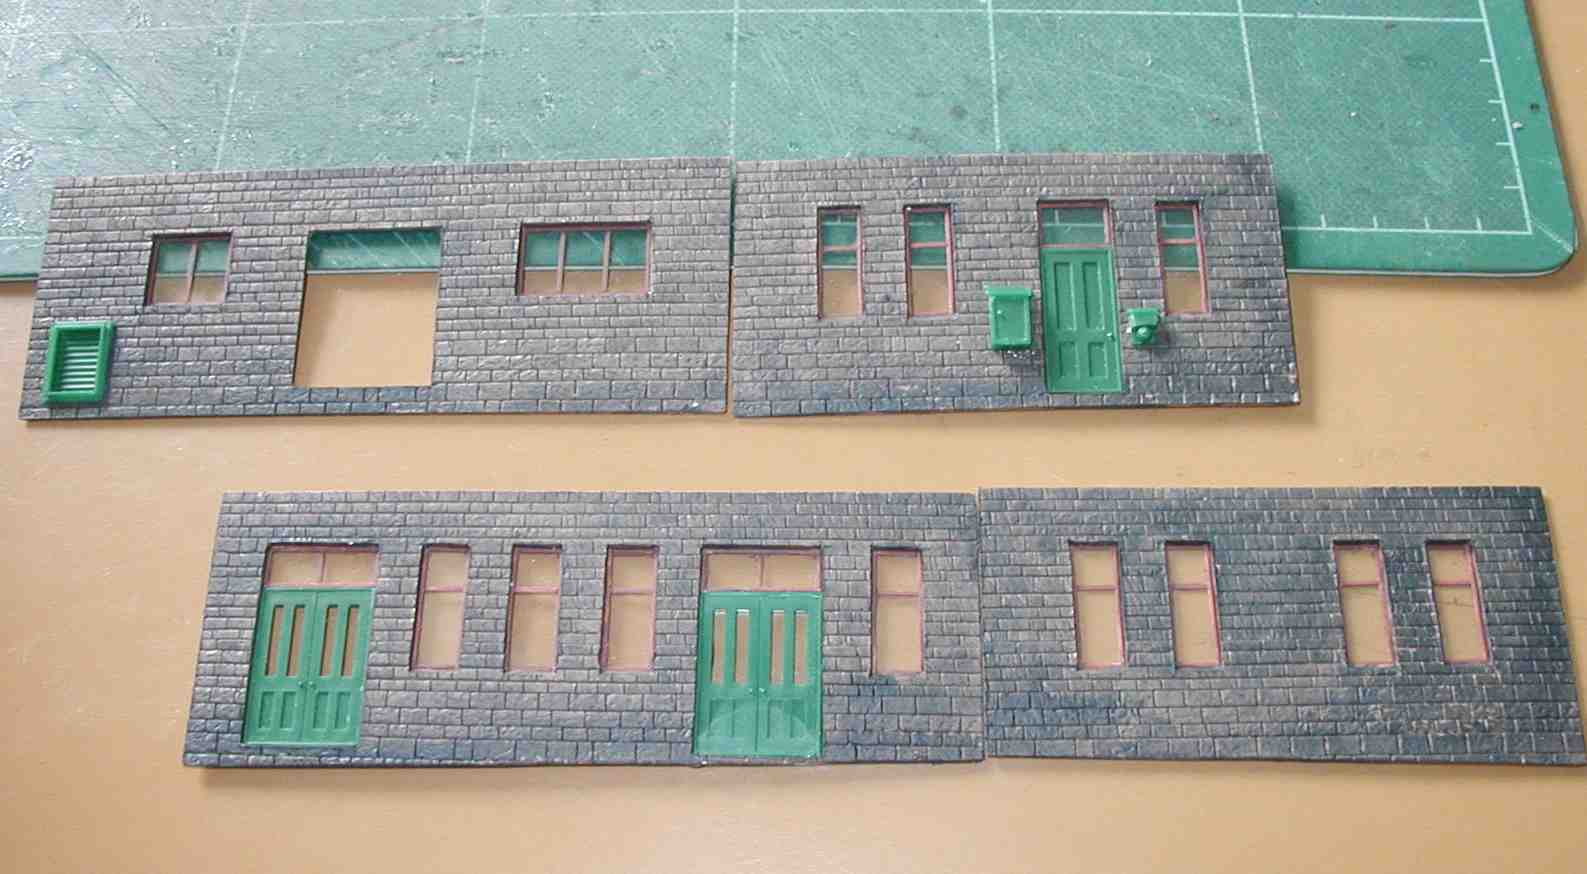
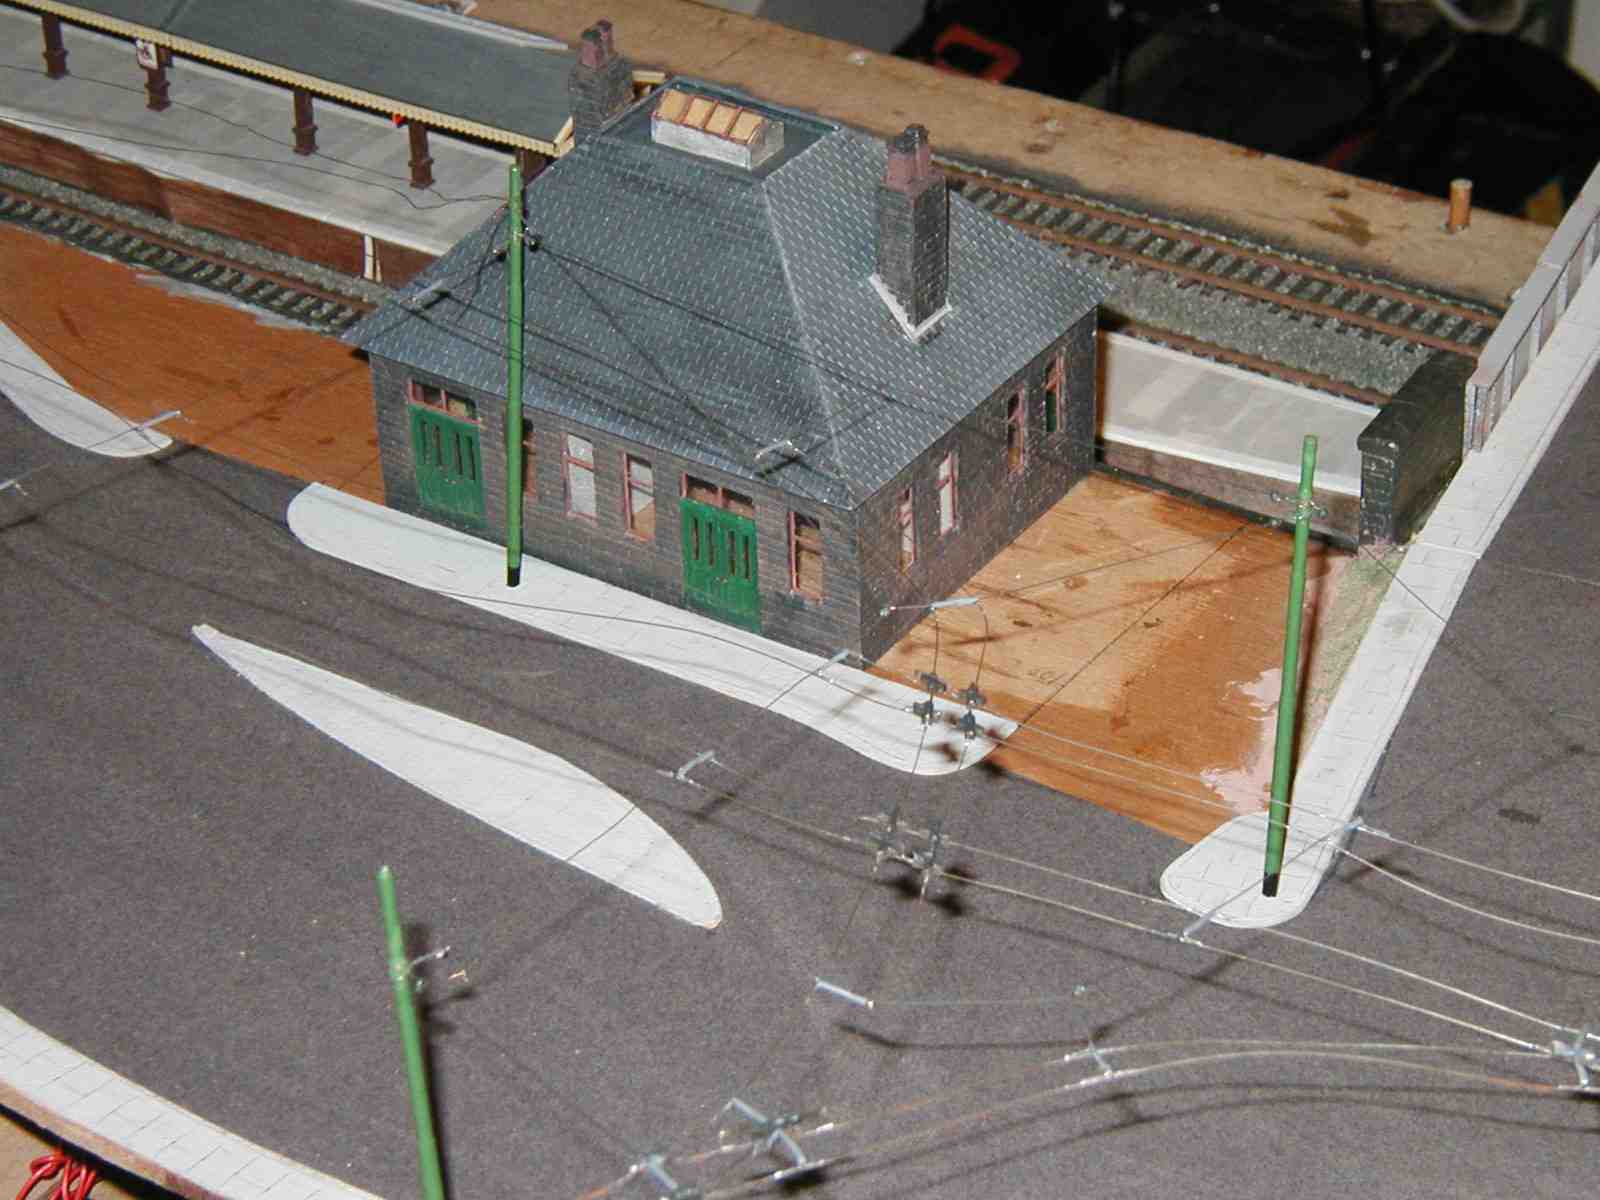
The next job was the station. Here the walls are cut out, detailed and 'flat-packed' ready for assembly. The station is scratchbuilt and it and the location are based on Armley Canal Road. The large opening is for the footbridge.
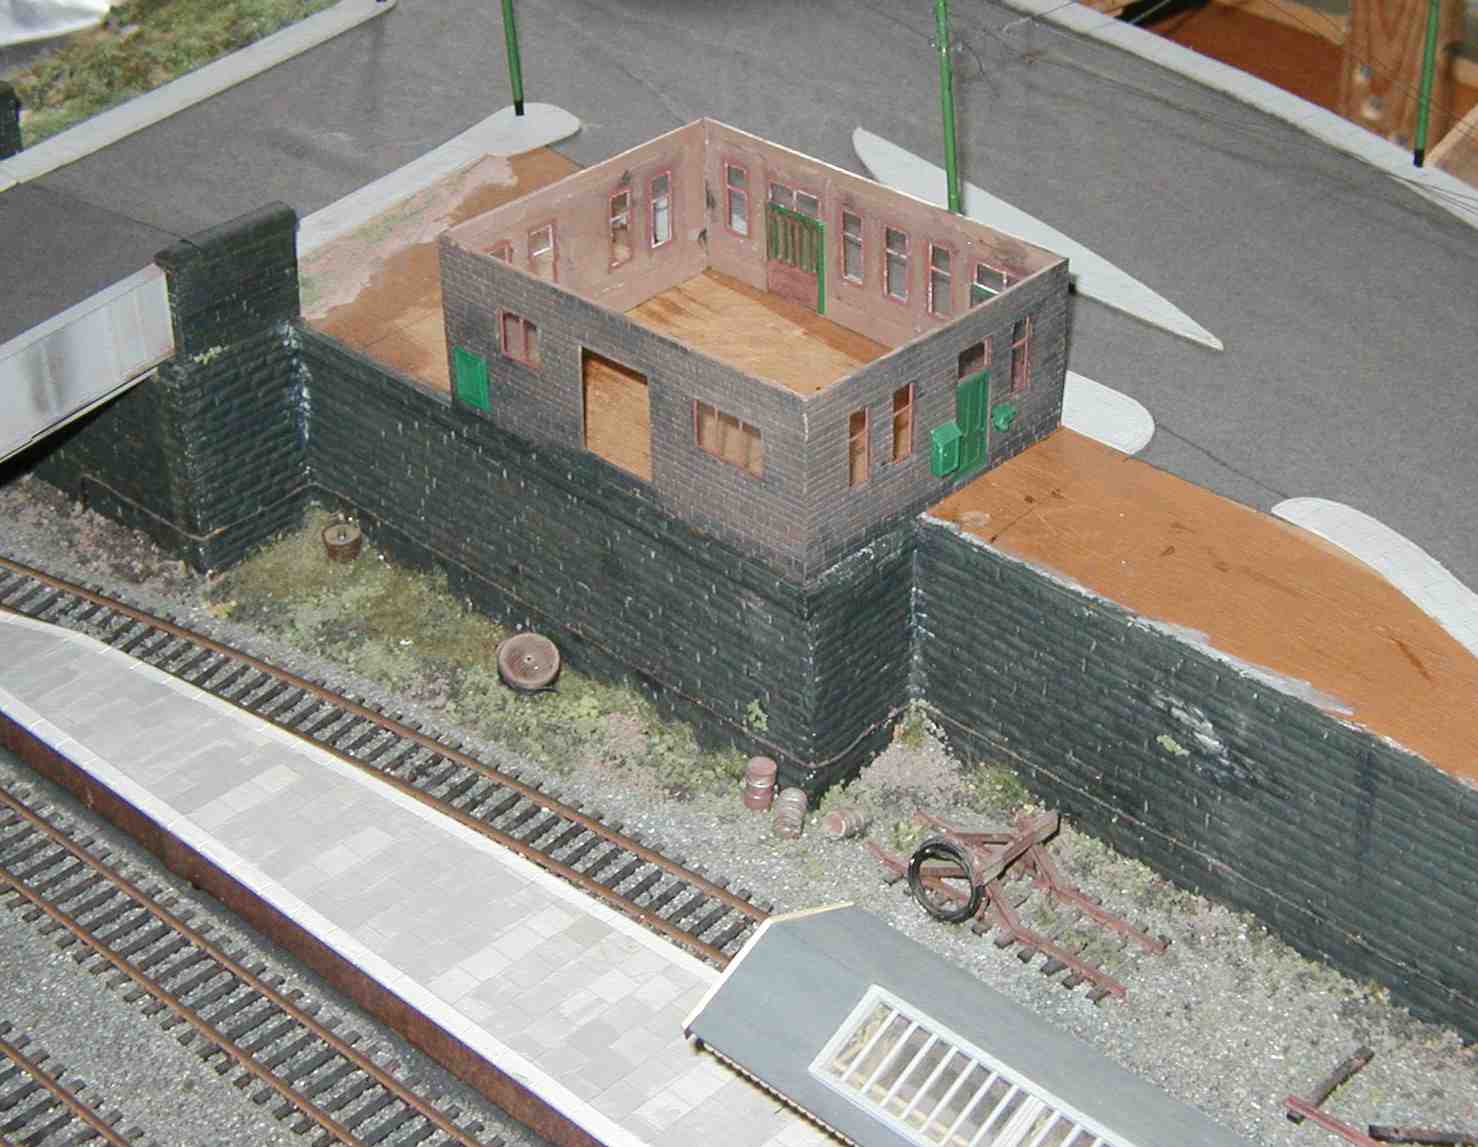
Trial fit in position on the layout.
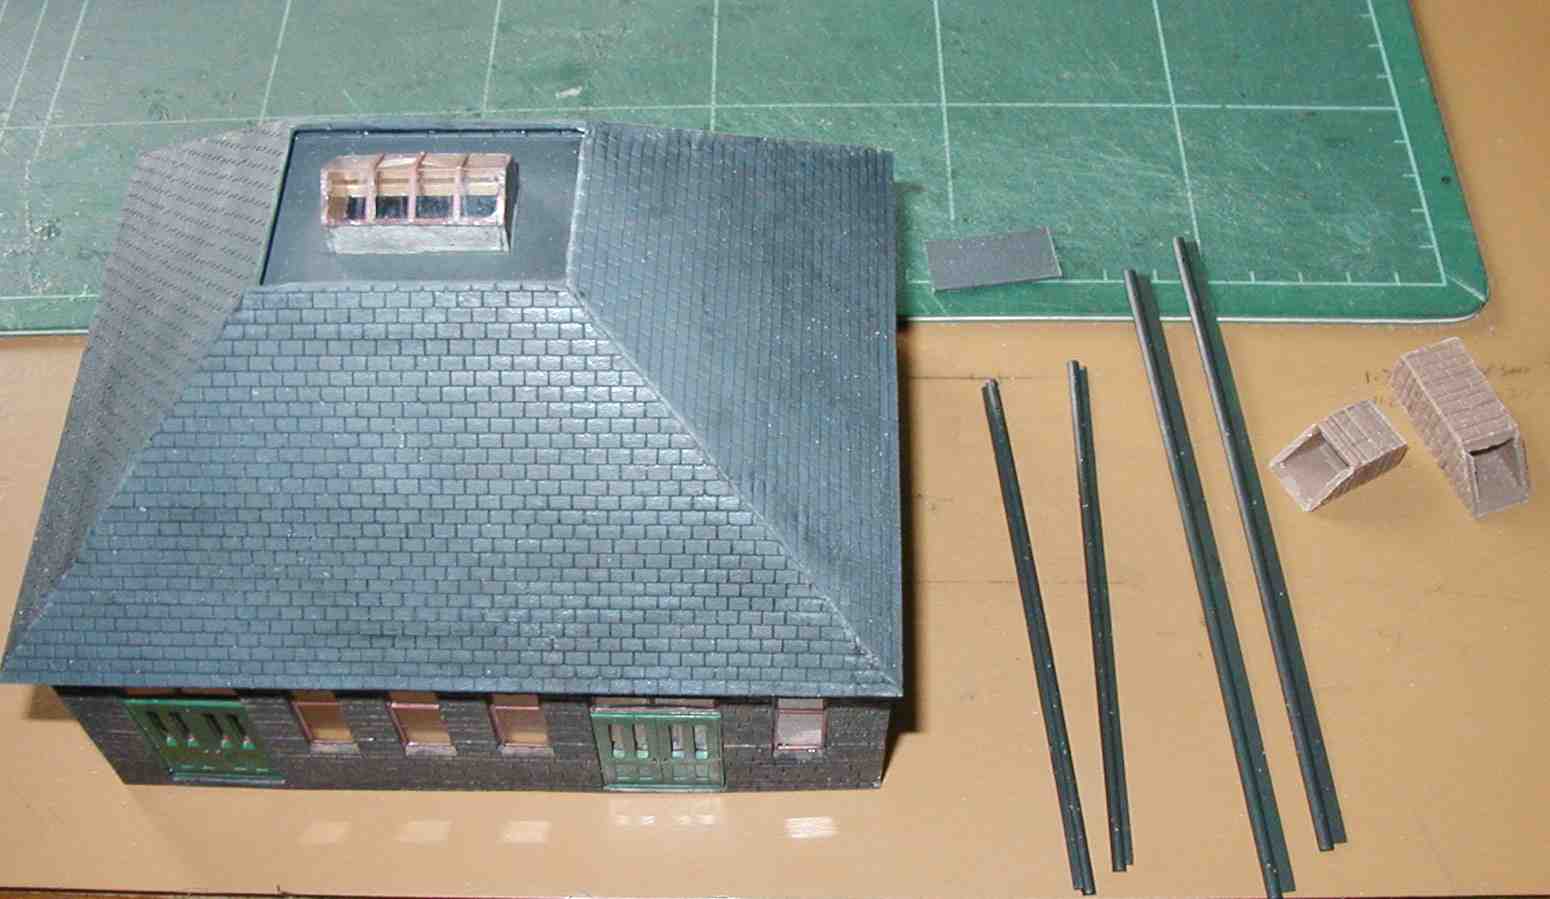
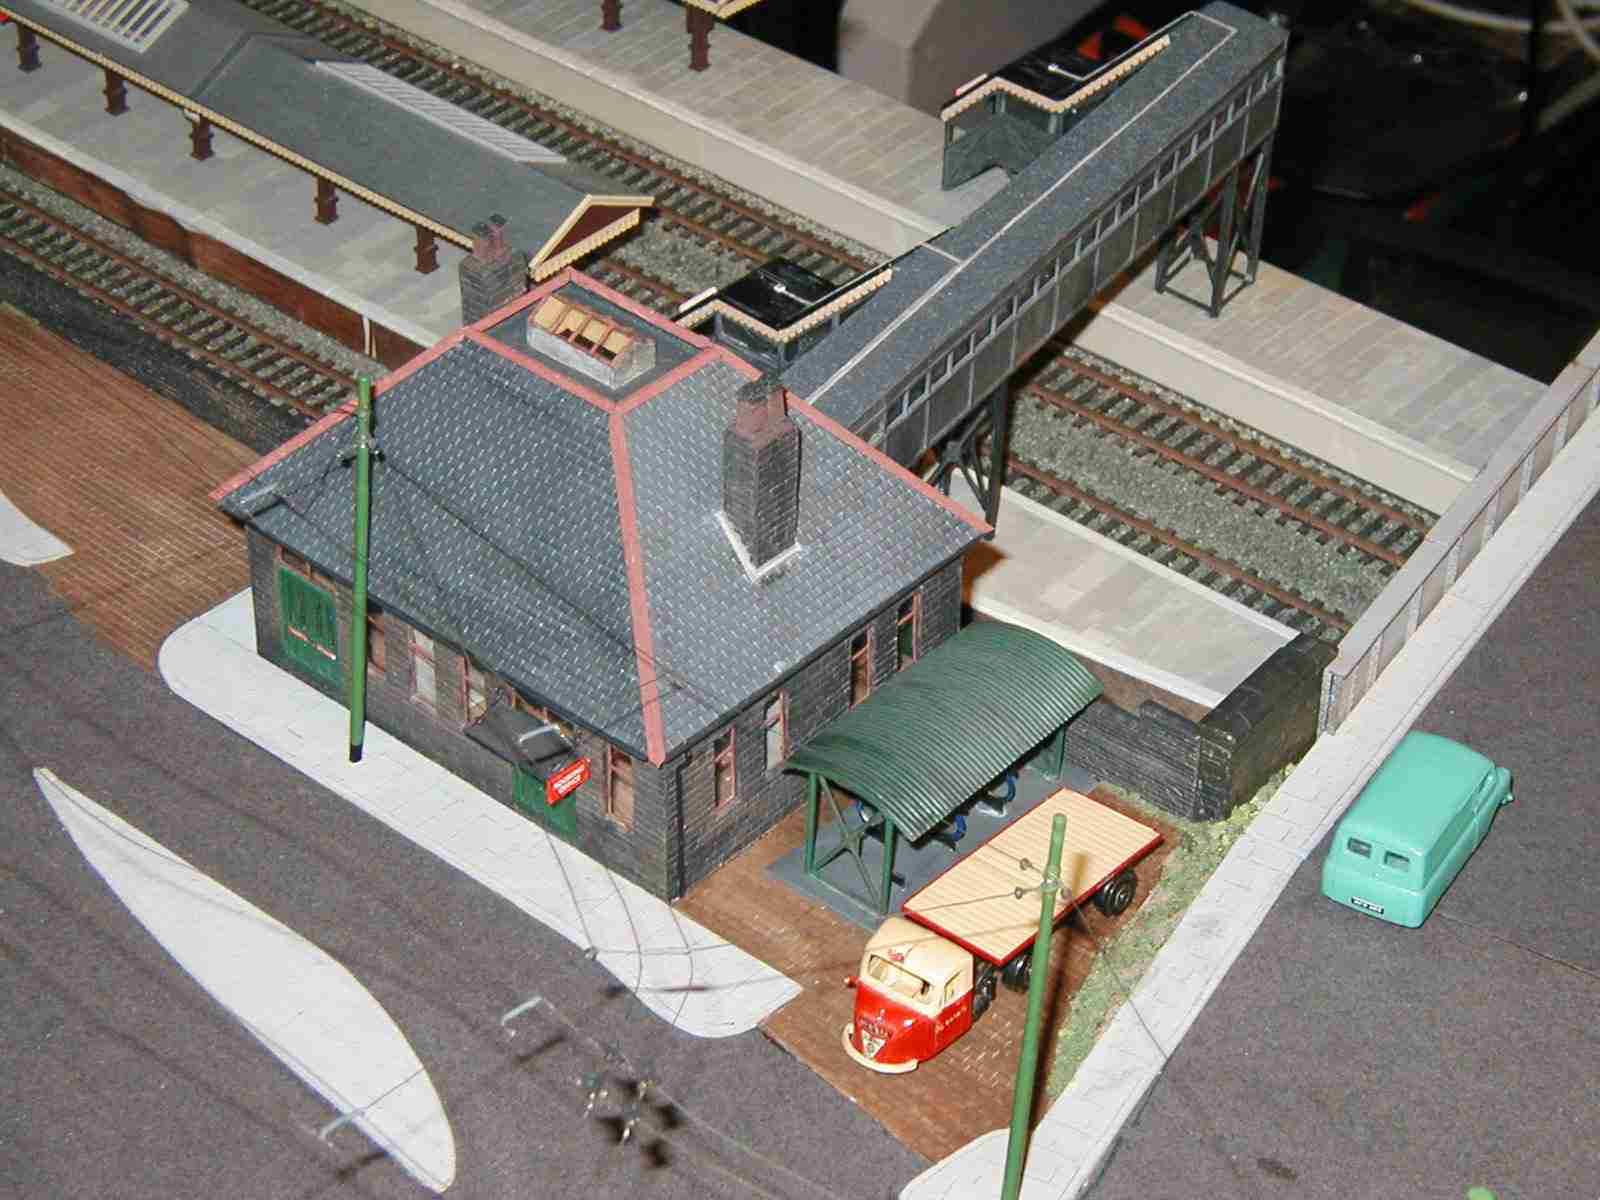
The complex roof with its skylight in position, and the guttering, chimney stacks and doorway awning being prepared.
The Station building almost finished - just some detailing to do. Next job is the footbridge. (>>)
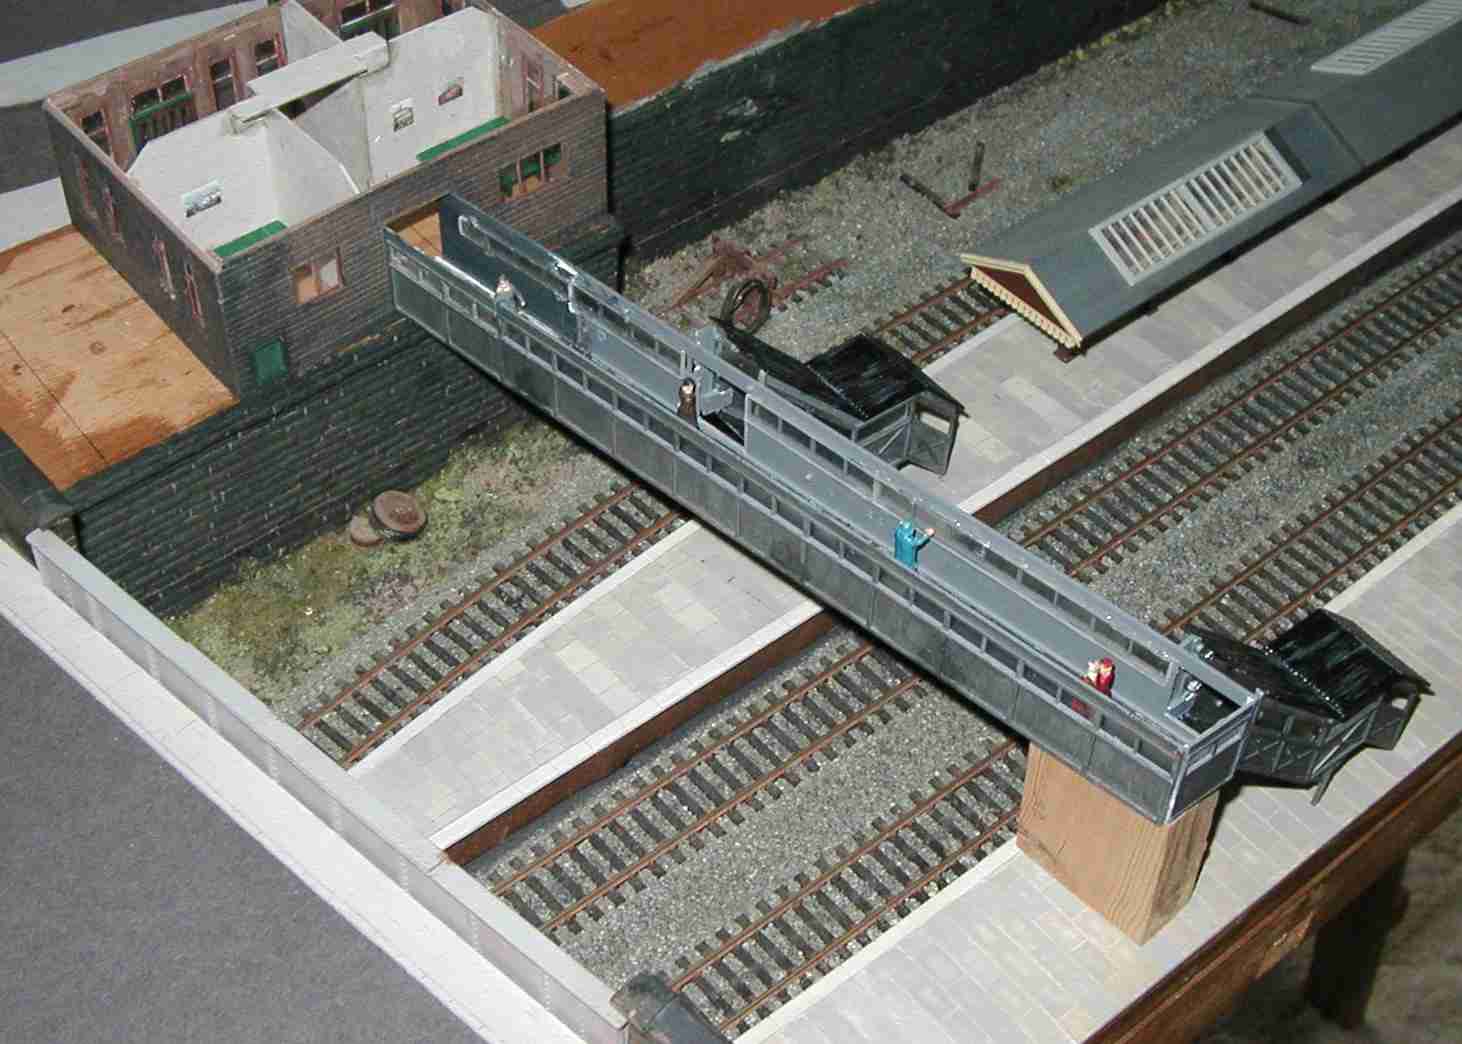
The main footbridge components made up from a substantially altered kit. As in the prototype location, the walkway will be covered.
Walling and road details now added. (>>)
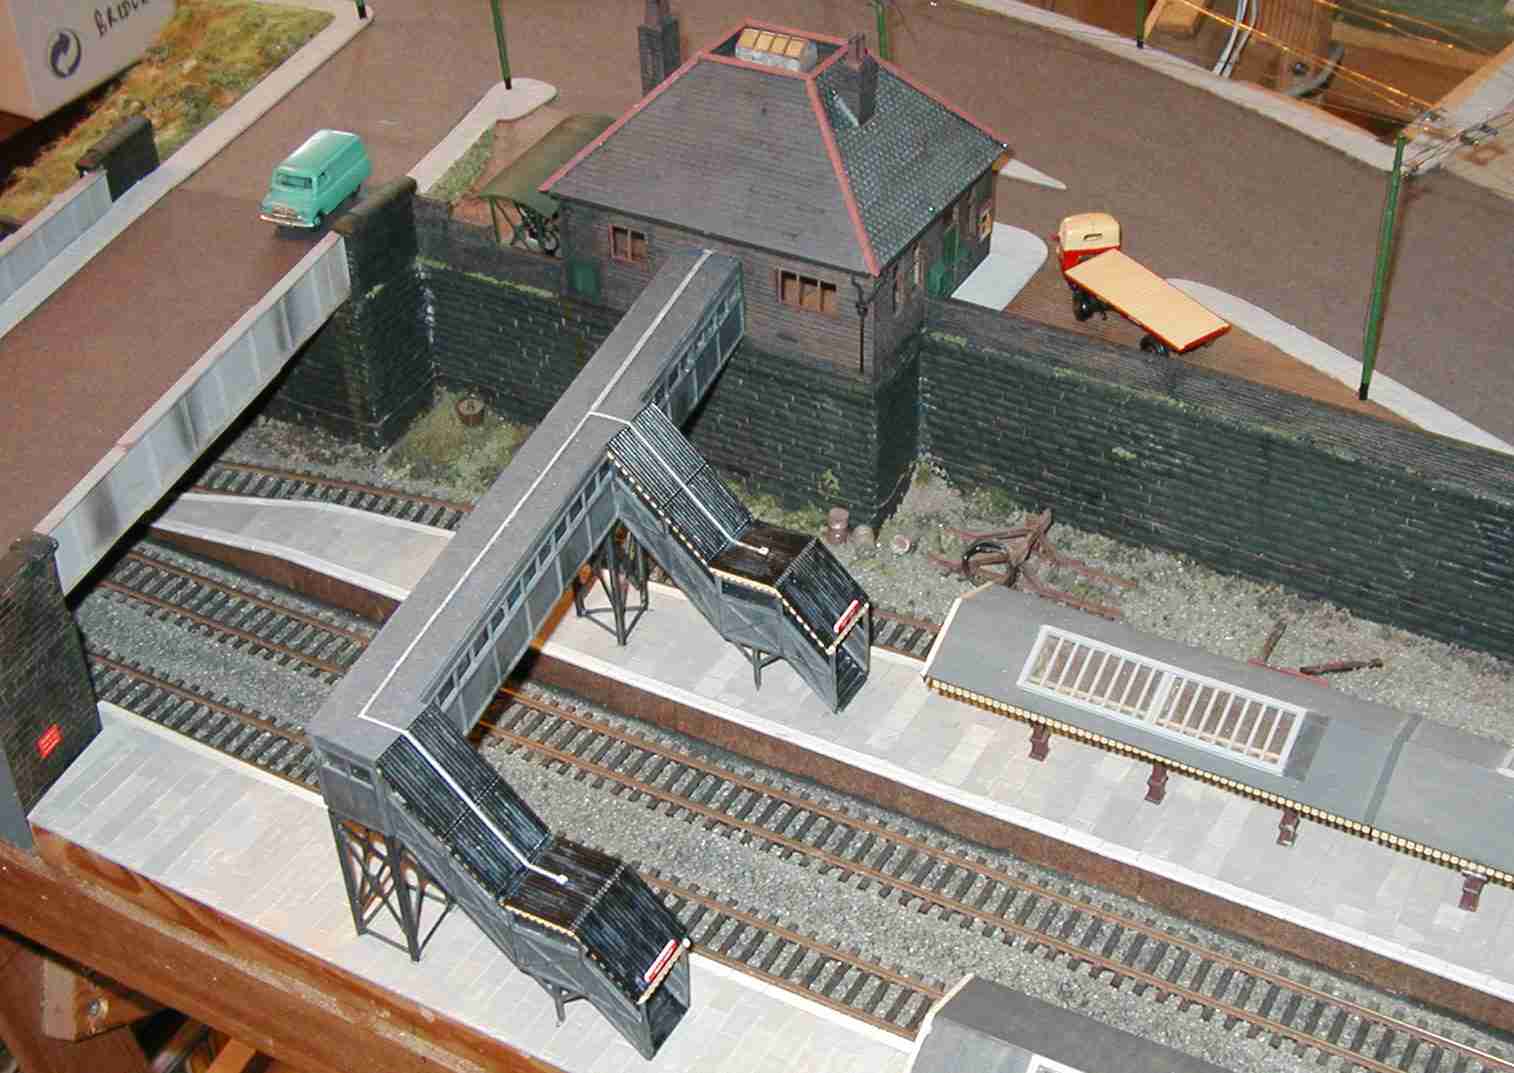
View of the completed station area from the platform side.
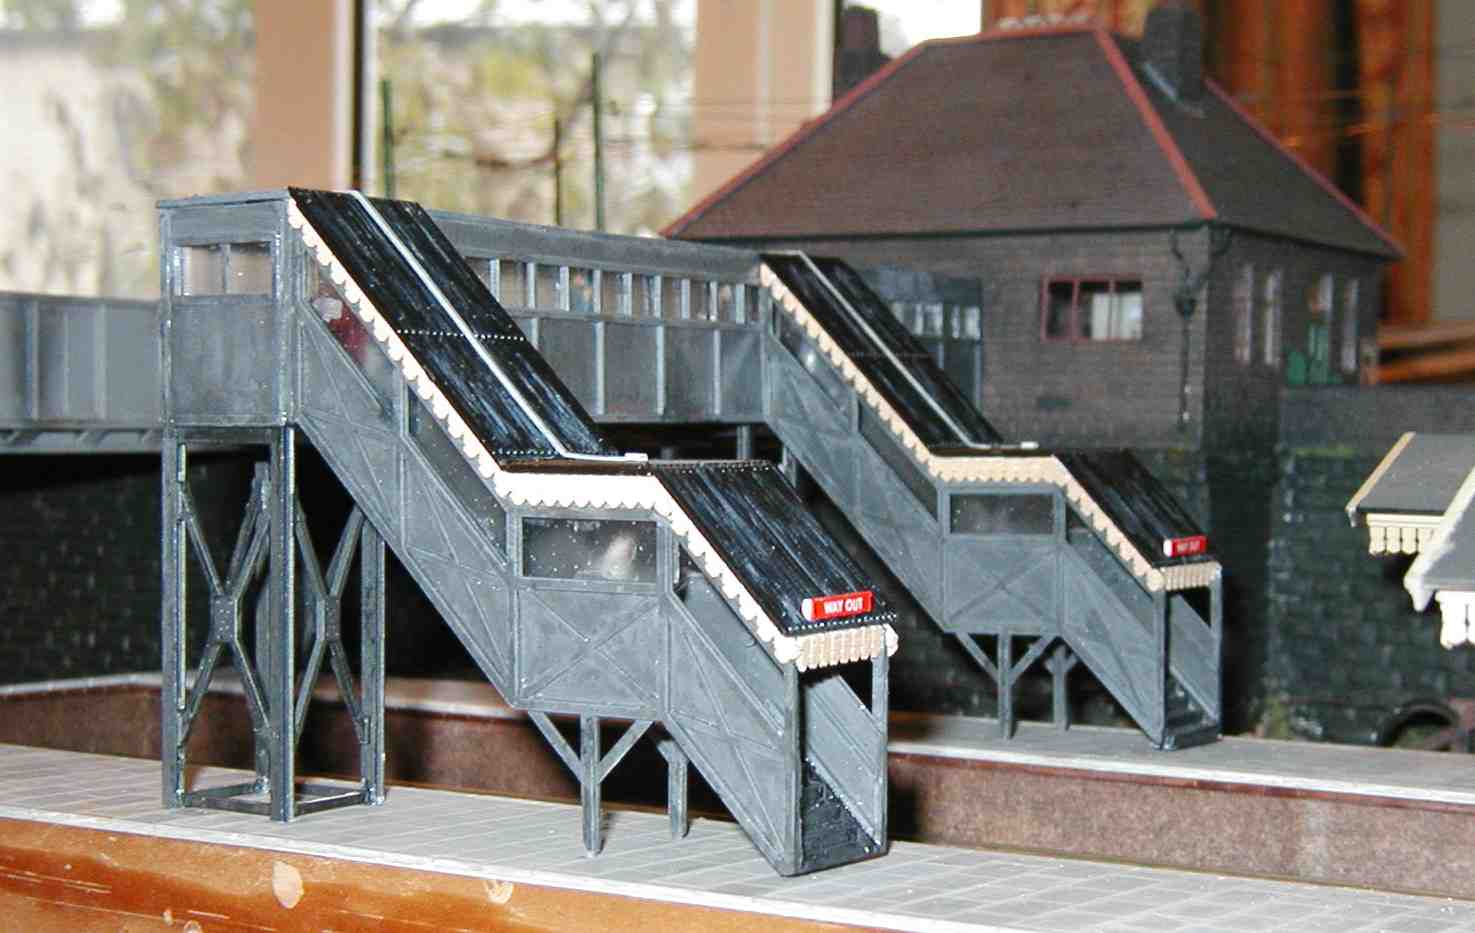
Low level view of the finished footbridge. The whole station dismantles for transporting the layout.
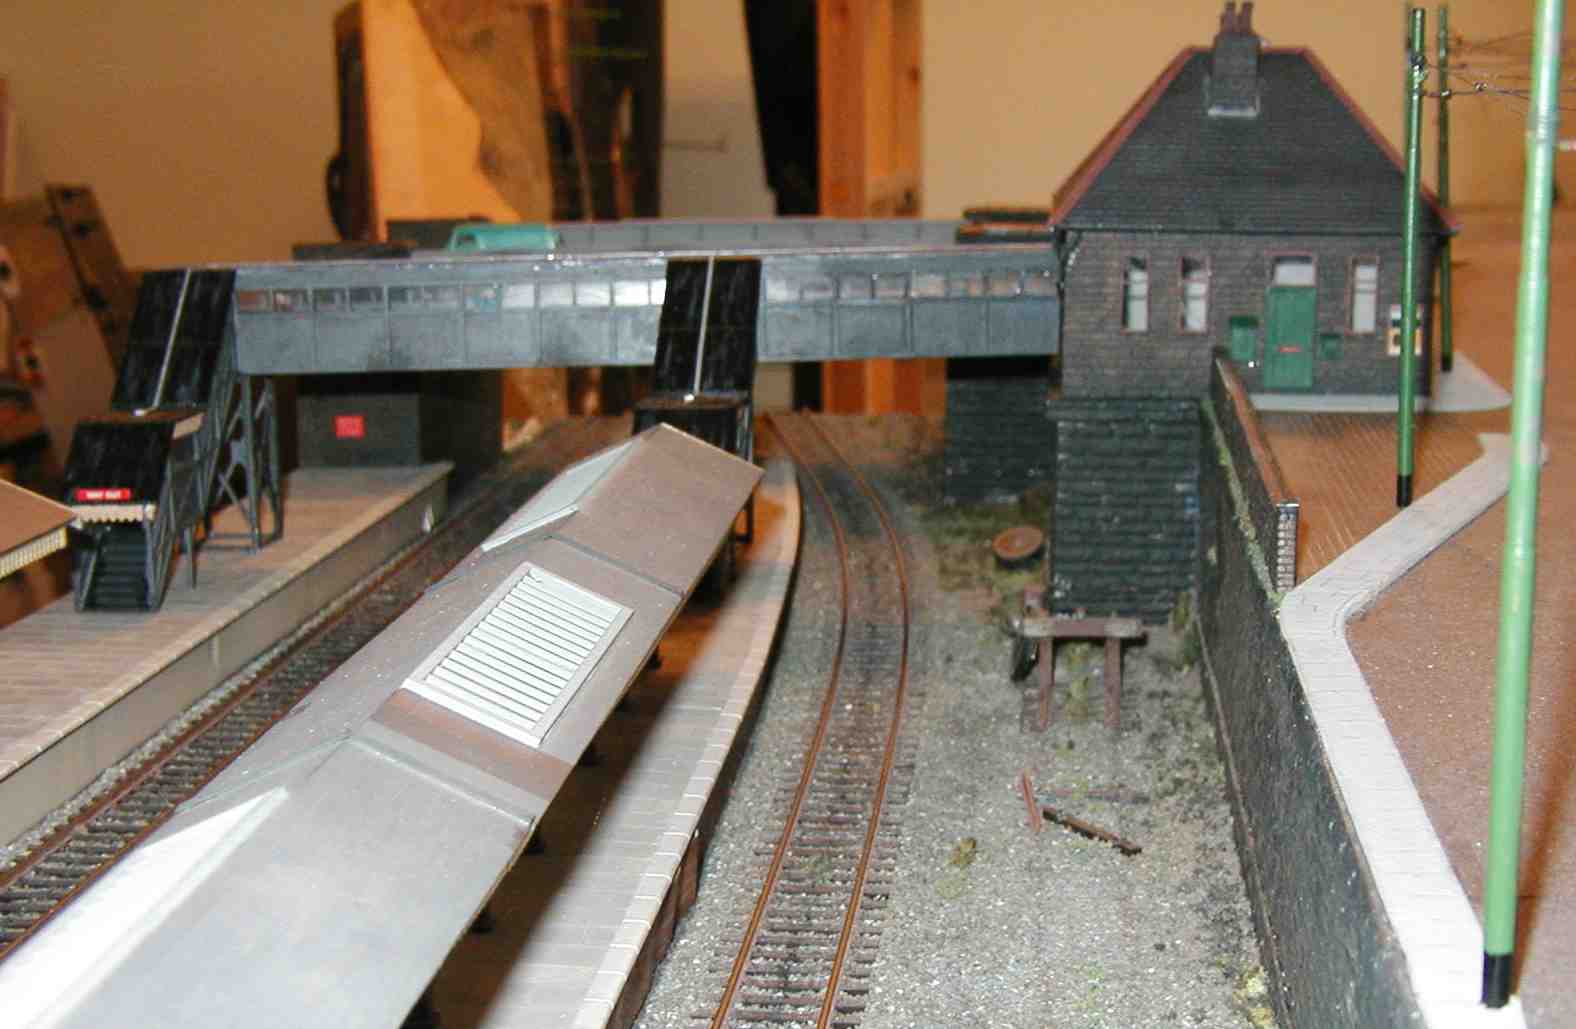
View along the lifted siding towards the finished station and footbridge.

The park area starts to get a makeover. Here, fencing has been mounted on the approach to the left and the wall columns erected ready for the park fencing.
Detail of the park fencing in position, with work still on-going on the Park itself. (>>)
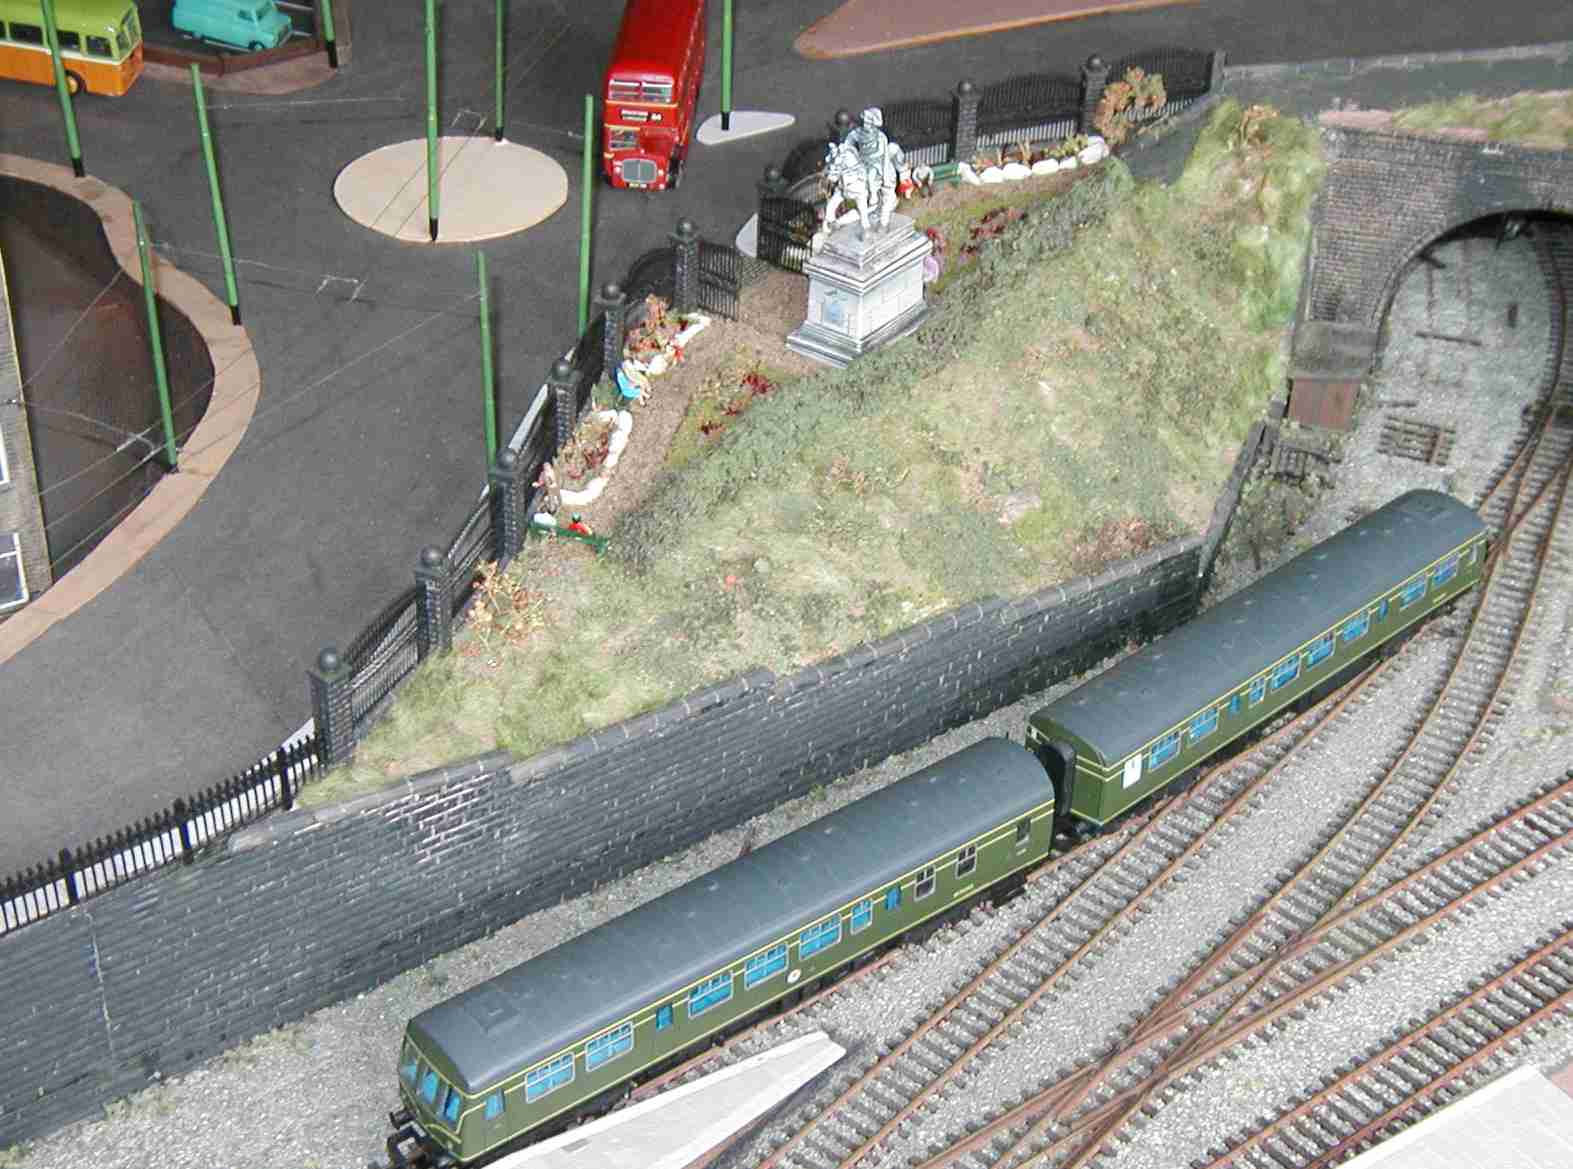
And here is the finished park complete with grass, flower beds, benches, people etc. (>>)
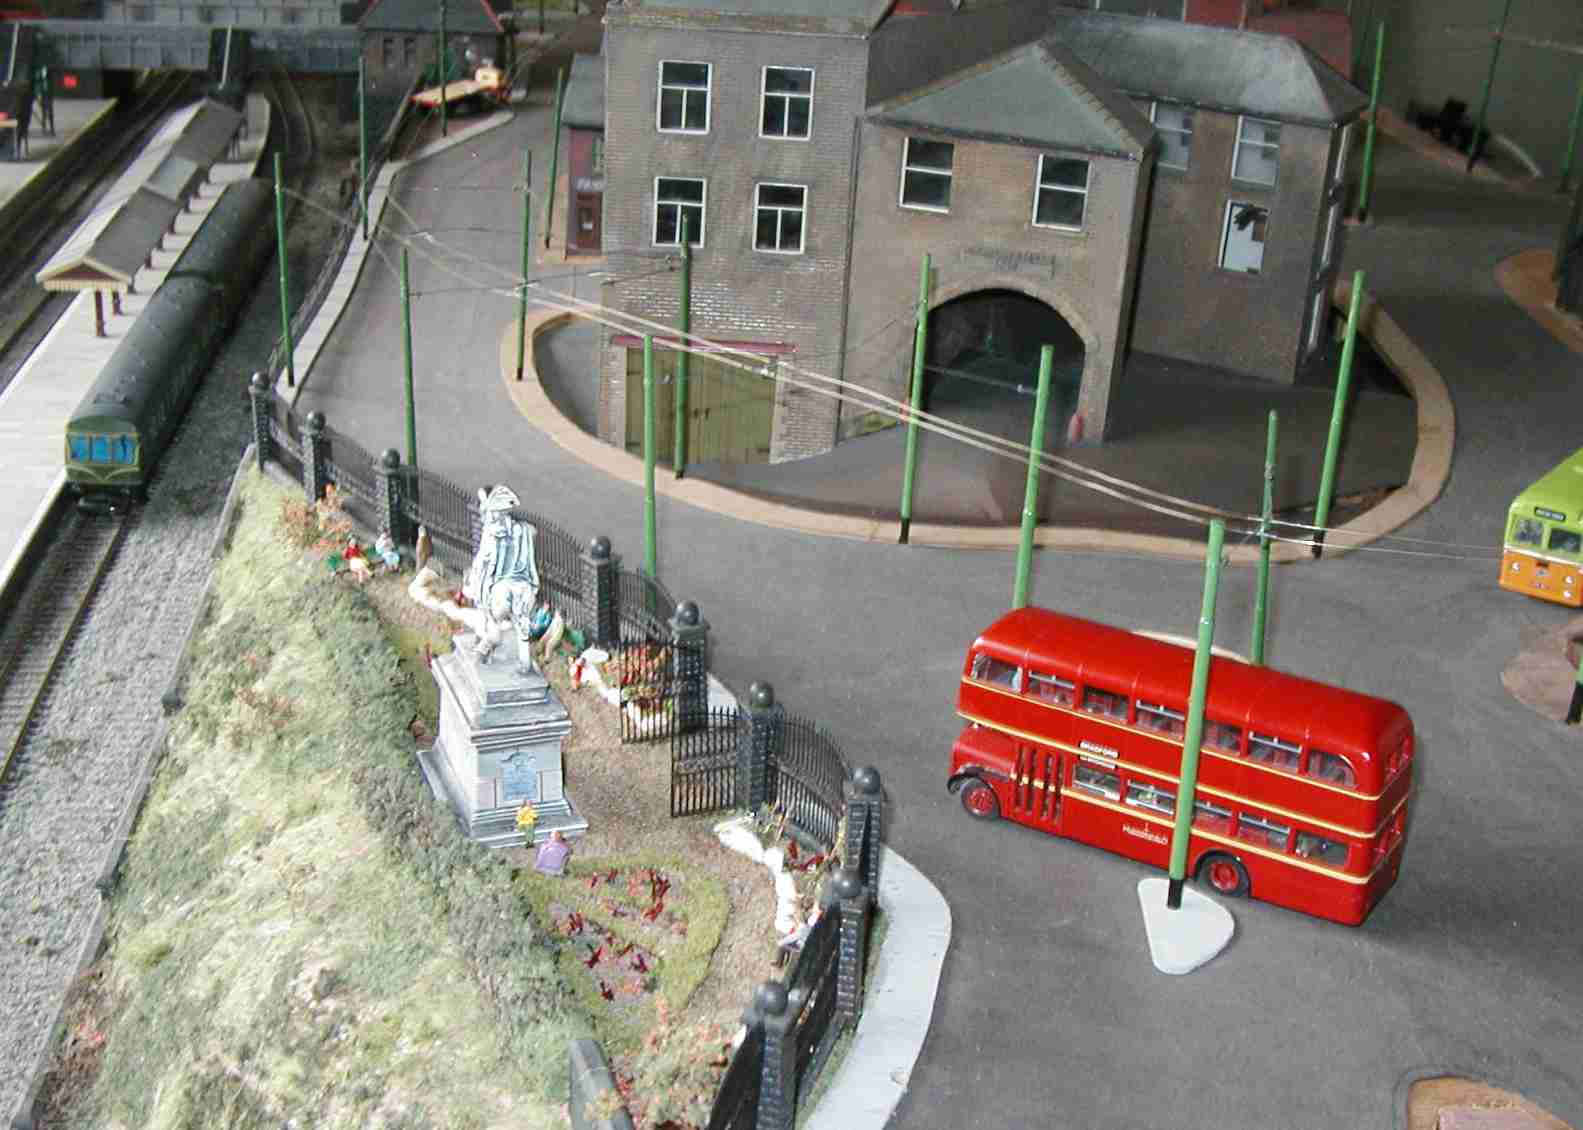
I wanted a stone statue of a soldier on a horse in the park. When I eventually found one, it had to be modified as it was far too big for my small park - but it is still imposing on its plinth! (>>)
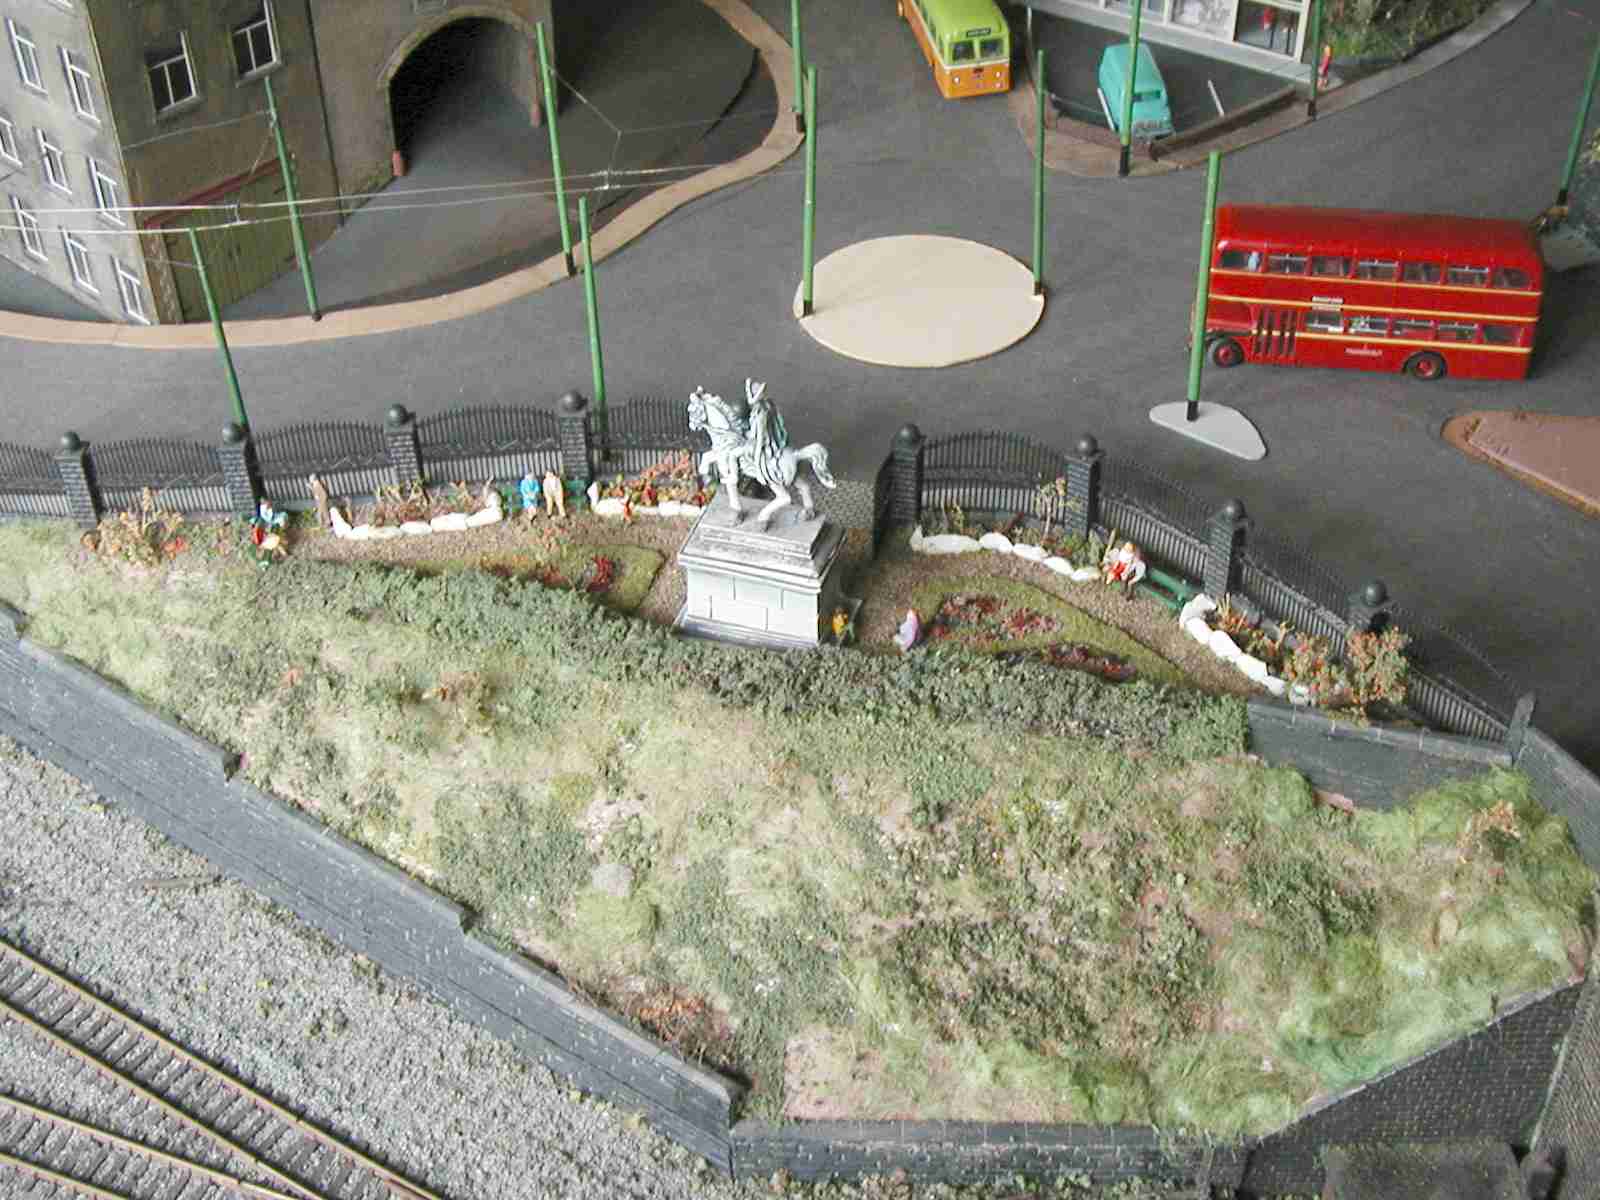
A view from the front. The roundabout still needs to be finished. (>>)

Otherwise, this area is now quite pleasing. (>>)
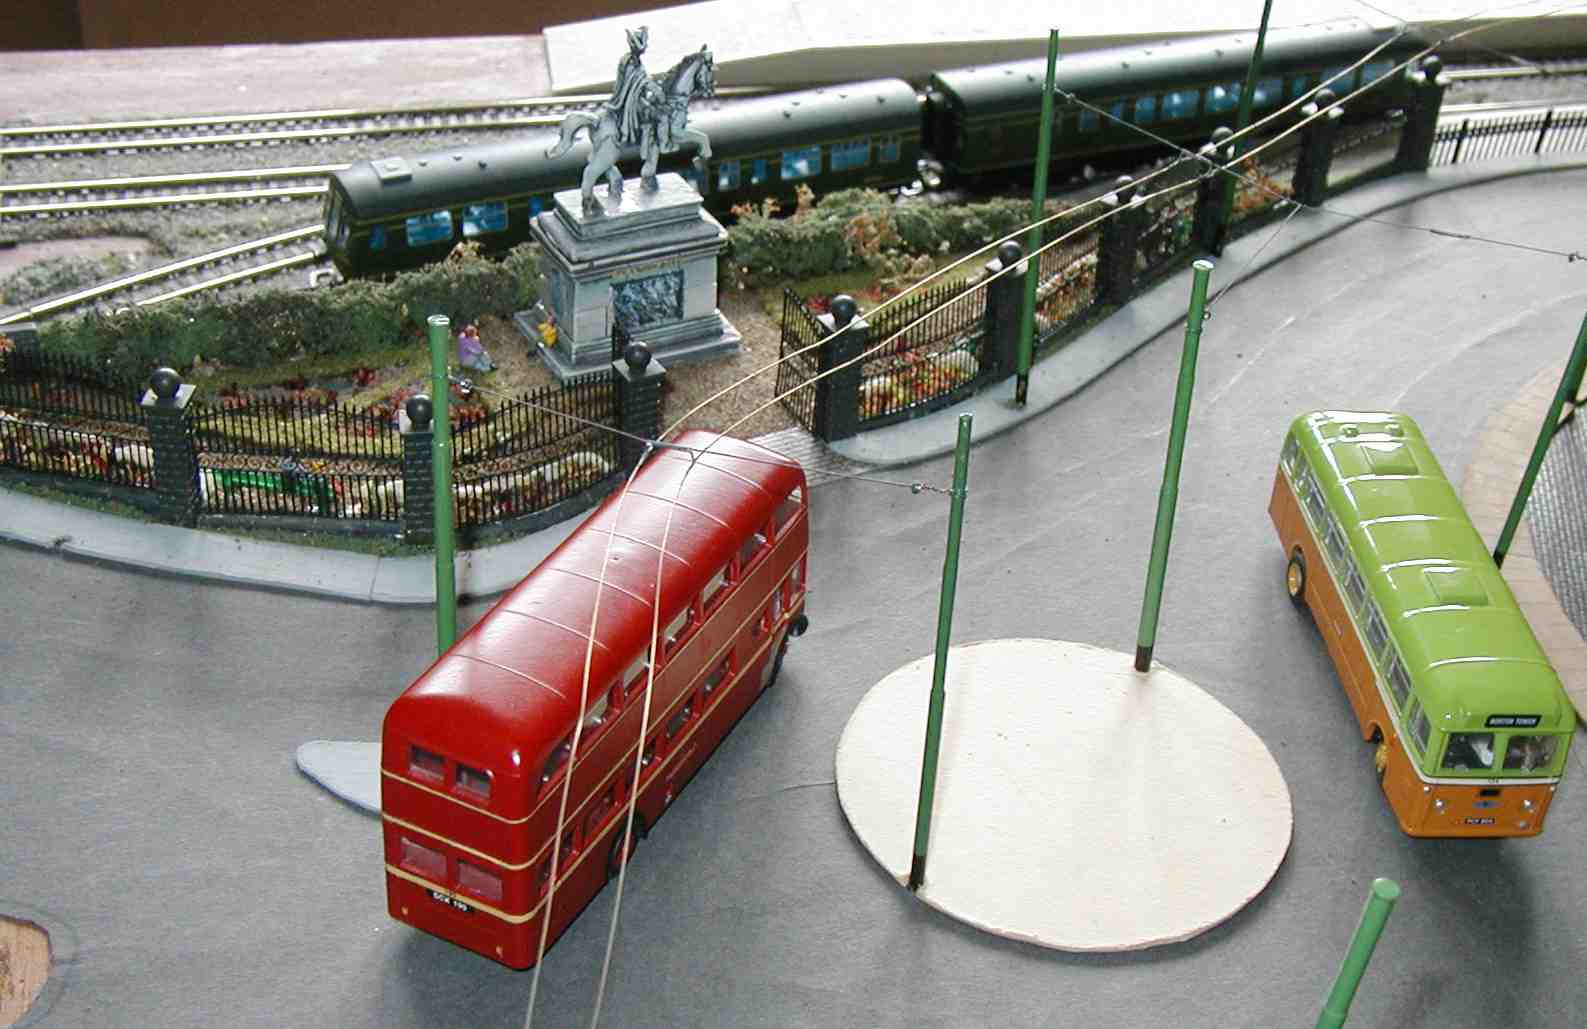
Anyway, the whole thing seems to have worked out really well for the space I had to do this. (>>)
DCC (Digital Command Control).
A Bachmann E-Z Command unit can be seen on the right. I plan to have companion units for further trolleybuses, so I don't have to select the right code to change vehicles - simply use the correct controller.
The next one will fit in the space at the side, displacing the DC hand-held controller seen here. The knob above it is to switch the overhead between DCC and DC for evaluation purposes. I'll probably leave this in place to provide a backup in case of failure of either system.
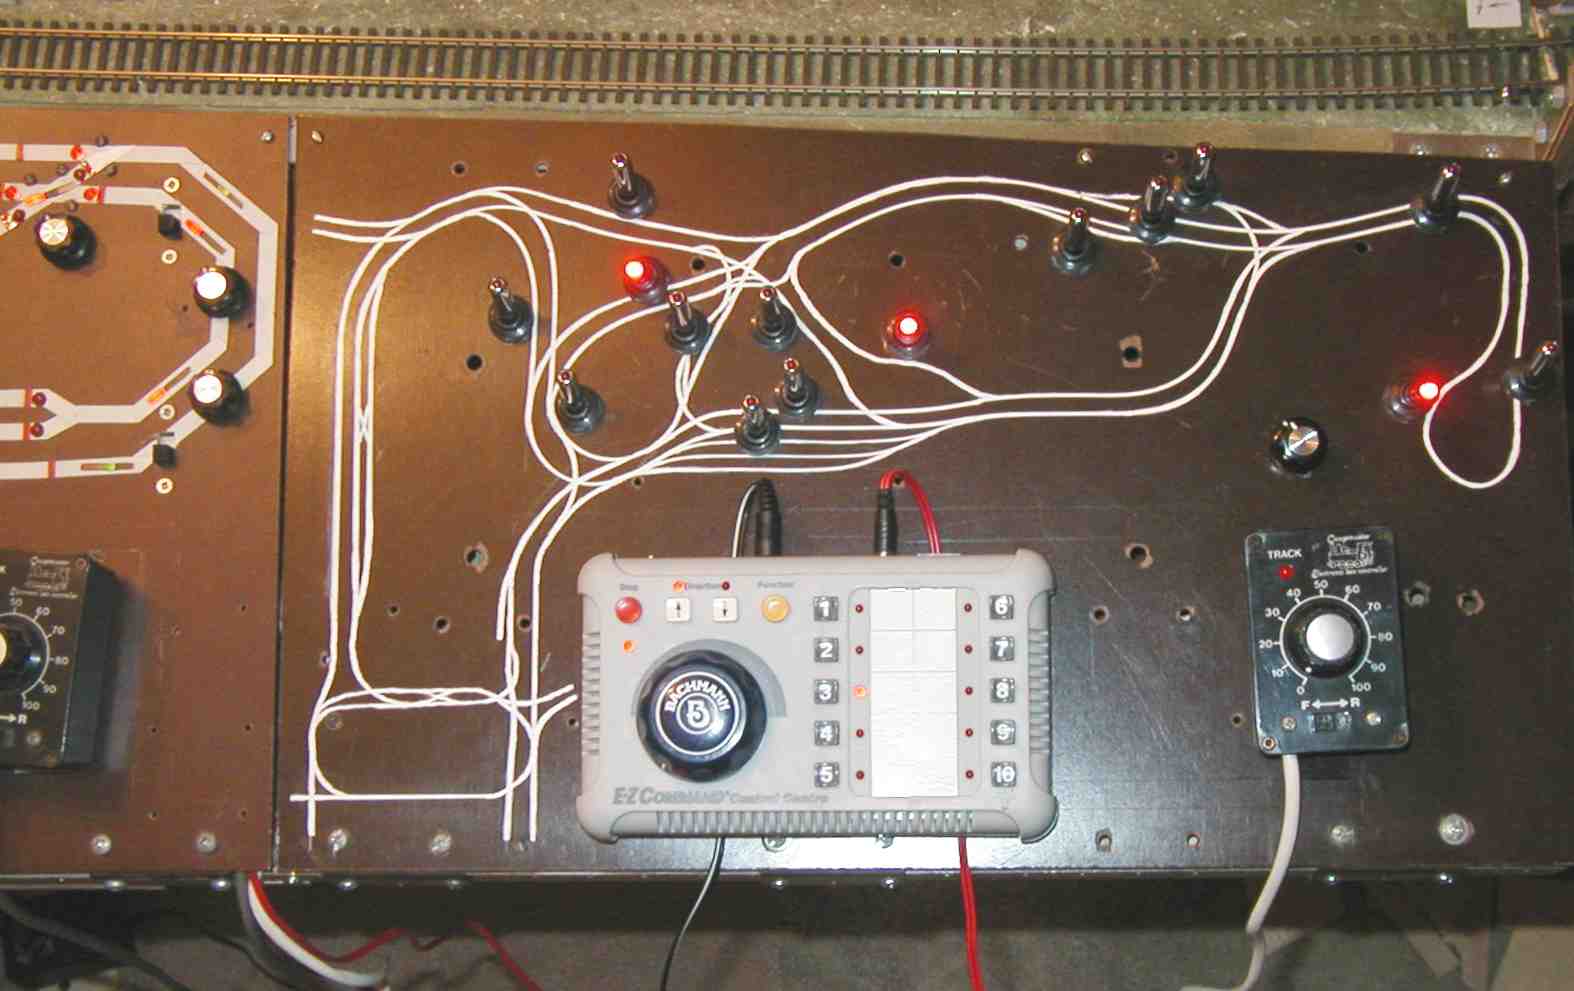
Control panel with DCC and DC controllers in place. A Trix DCC hand controller has now been obtained, and this will program the CV's which the Bachmann unit won't. Note that some of the bus stop switches are 'on' in this view (they are lit up). (>>)

The DCC chip fastened to the ceiling of the lower deck in the trolleybus, where it is out of sight. The Gaugemaster chip has a plug on it, so I can now easily separate the chassis from the body without having to unsolder wires. (>>)
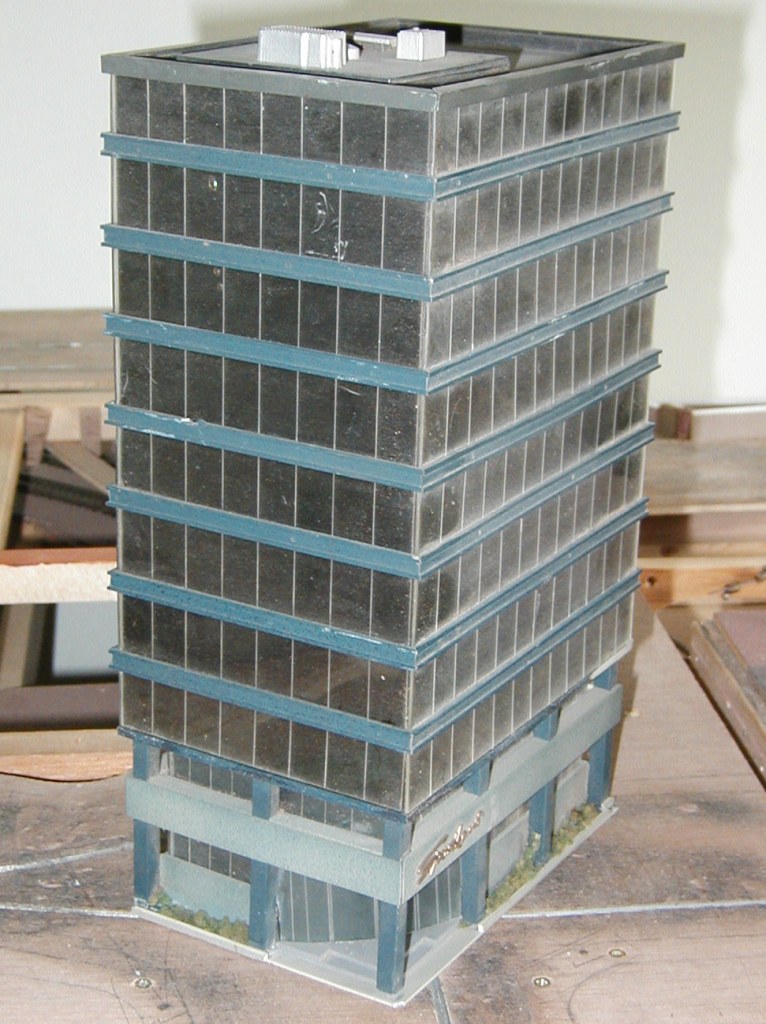
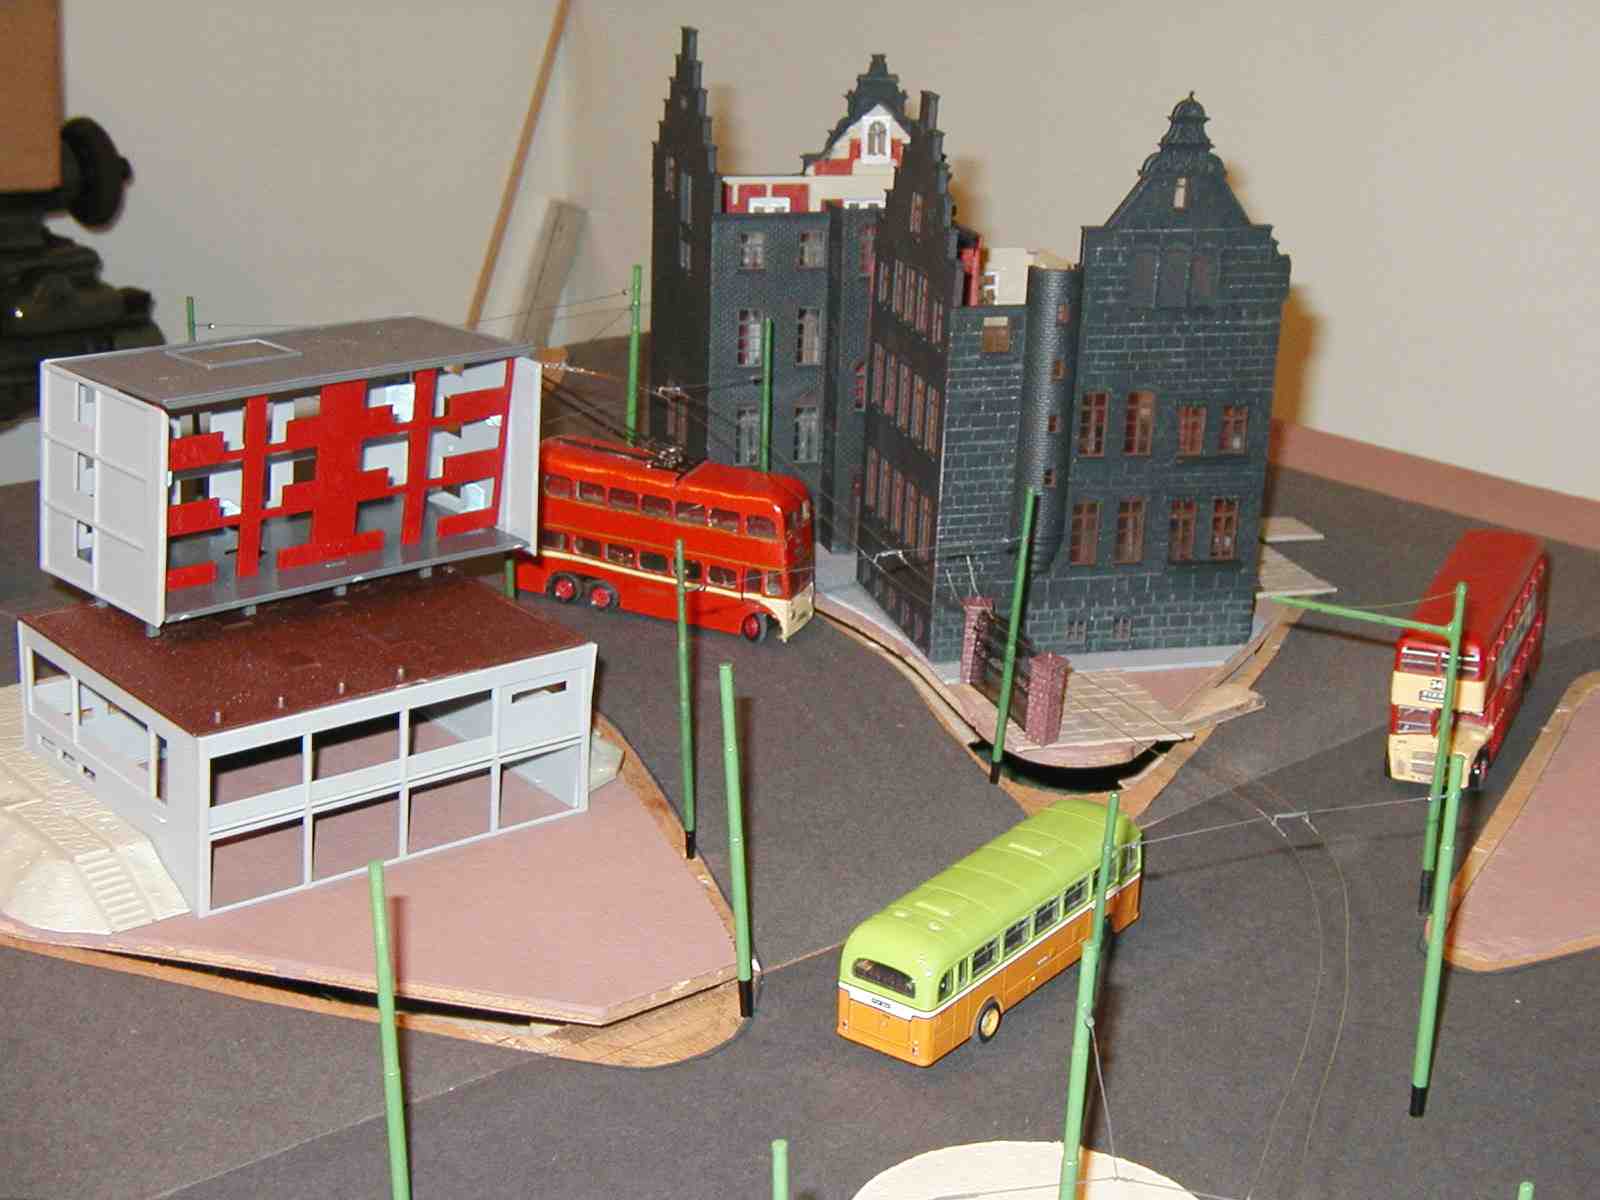
A 1960's style office block has been obtained - from Australia ! I had been searching for something appropriate for ages, and this turned up on ebay. This is how it arrived. It had to be completely 'knocked down' into its main parts so that I could reconfigure it to the right shape for the location on the layout. It needed to be more triangular and the exterior cladding would be altered. (>>)
Here the shell has been reconfigured into its new shape, and levelled up to suit the location between the Town Hall and the park. The upper floors have been reduced to 6 instead of the 8 original ones to make it closer to '00' rather than 'H0'. This side of the building features a colonnade inside the pillars. Structural steelwork has been reinstated. The shop windows have also been installed but these still require interiors. (>>)
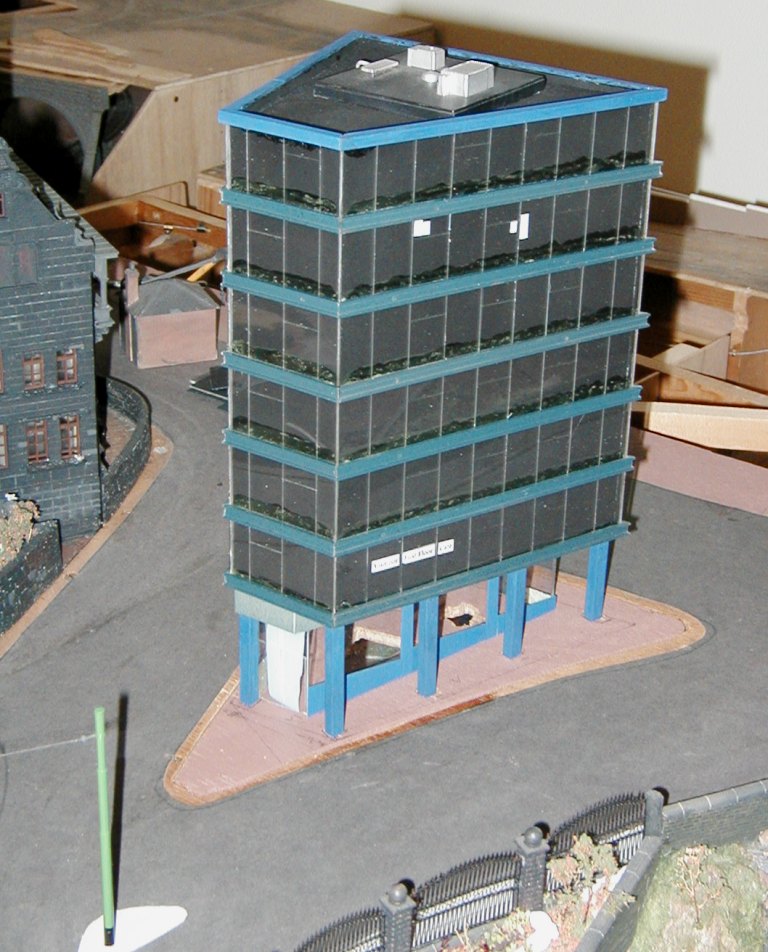
A first view from the other side, showing that one floor is
still 'To Let', indicating the recent completion of this town centre
building.
Still to be added are the cladding sheets much loved of tower block
designers of the 1960's.
The interior is simply matt black to provide the lack of a view inside as
many of these office blocks had.
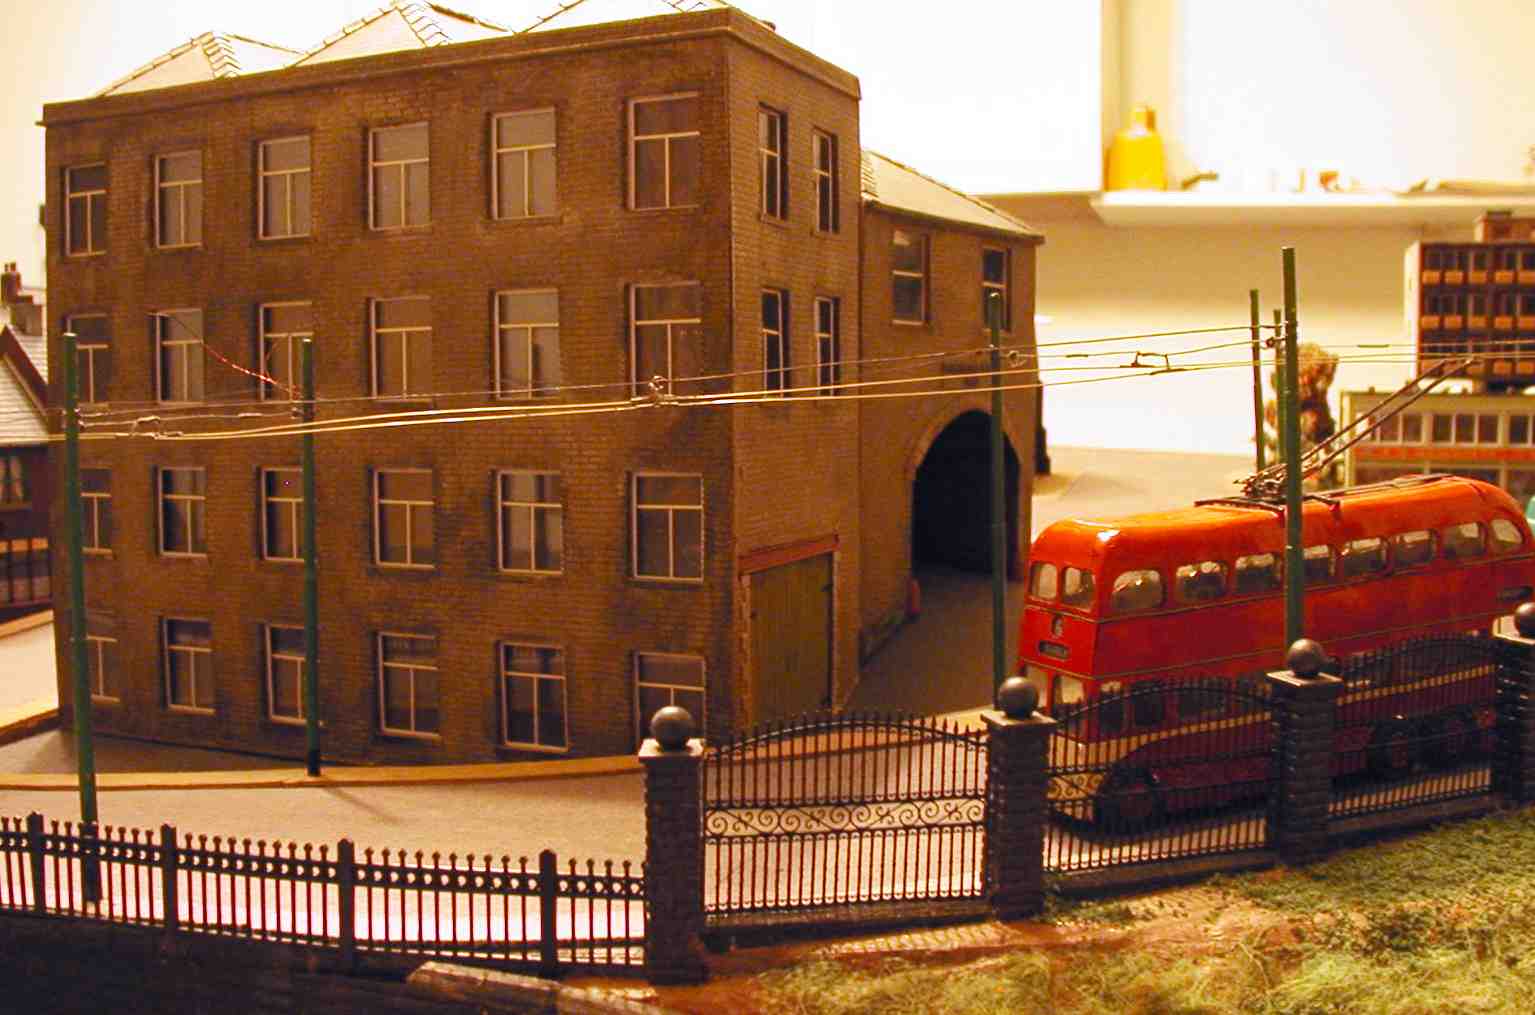
As can be seen, this office block will
be quite imposing and reminiscent of 60's-style developments.
(>>)
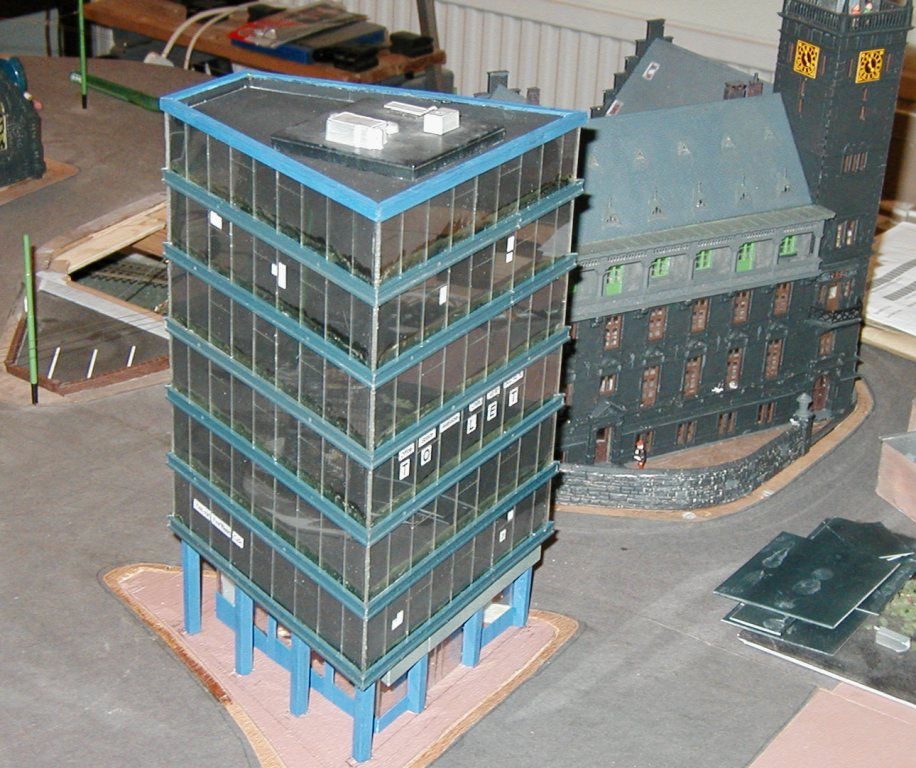
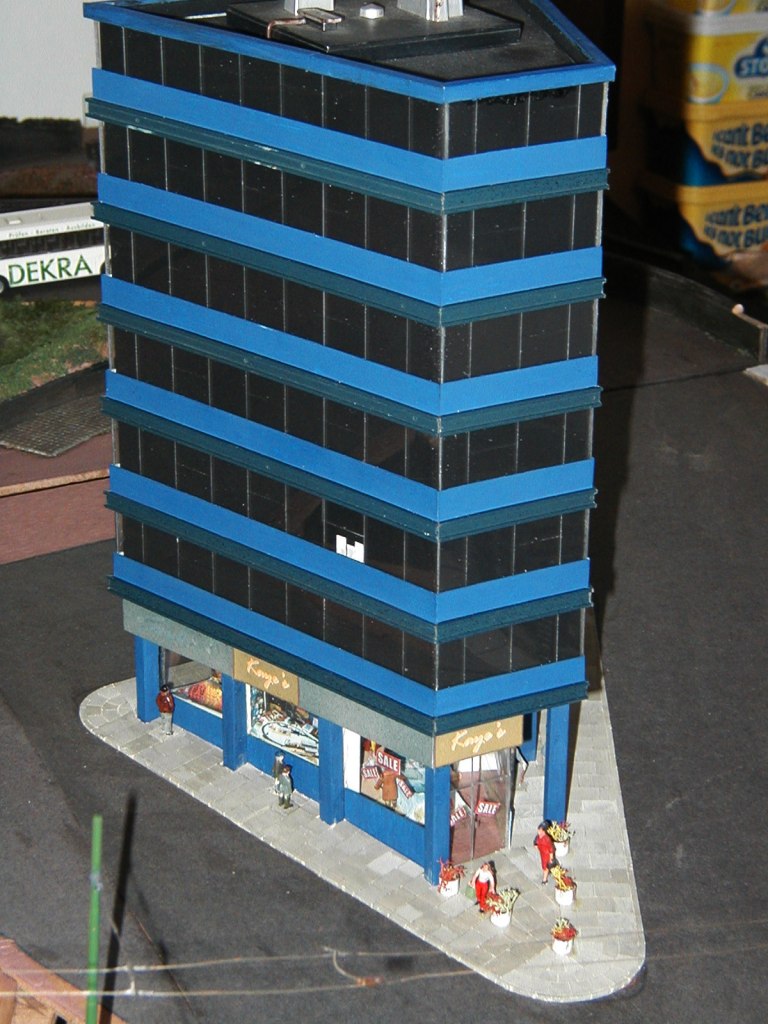
The Office Block now with its blue cladding sheets in place
(the dots of white on the windows are advertising or office memos stuck on).
The shop windows, however, still have to be detailed. This shot was taken at
the Sandtoft Model Weekend in September 2008 and show how this end of the
original layout is virtually complete.
(>>)
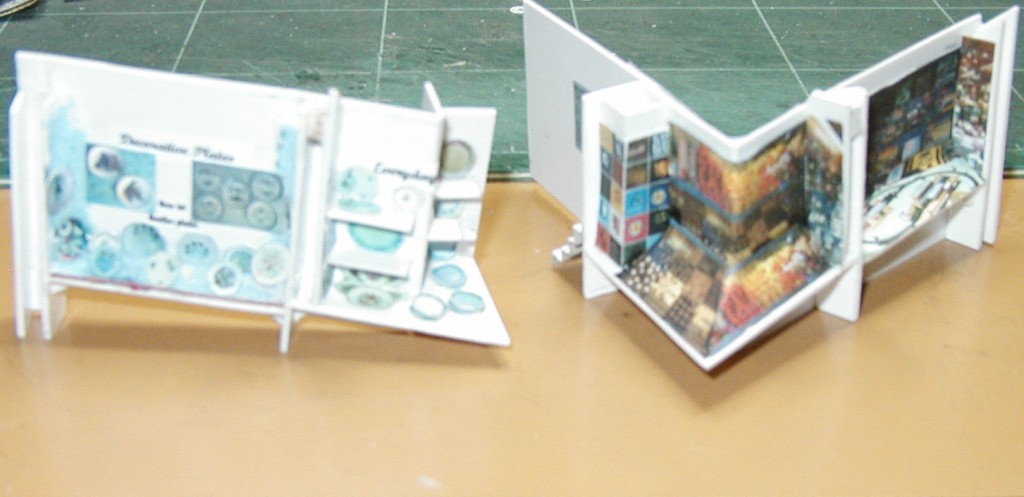
The shop window units ready for installation. There are windows for decorative plates (even special edition Beatles plates!), everyday crockery, sweets and model railways.
The picture on the right is a front view after the shop windows have been installed, various detailing jobs done on the interior and people added. (>>)
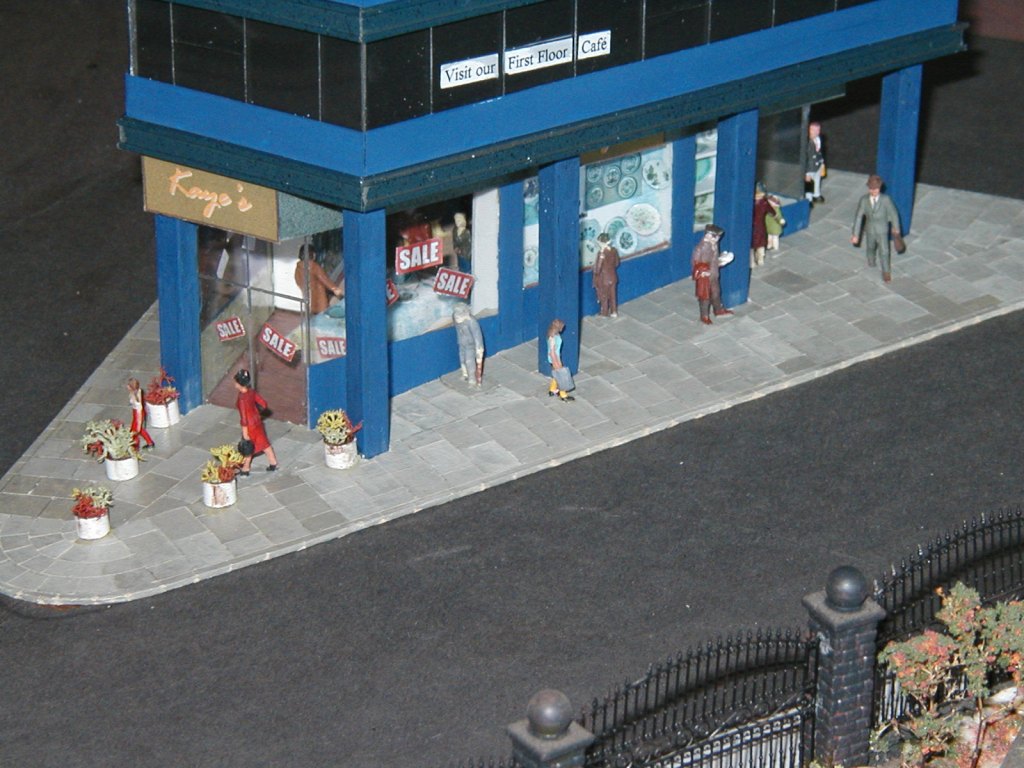
The 'colonnade' side of the shops - Kaye's department store who are holding a Sale - showing the crockery section. The town centre looks somewhat busier now with the addition of lots of people. (>>)
The entrance to 'Electric House' - ie. the office block, at the back. (>>)

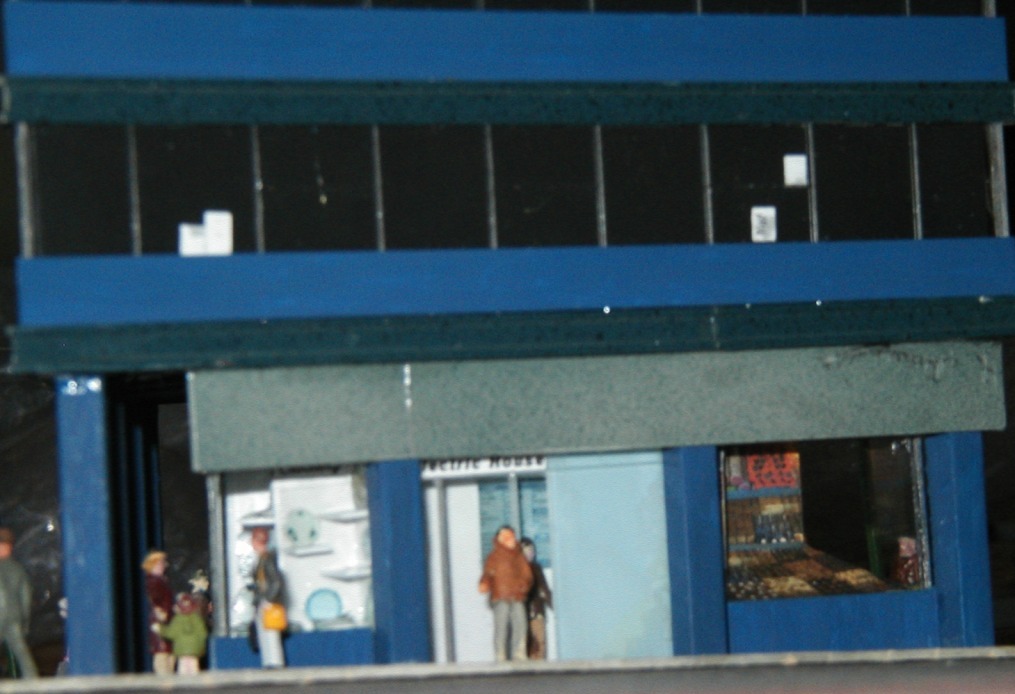
The third side showing schoolboys examining the model railway window, and the chocolate shop. (>>)
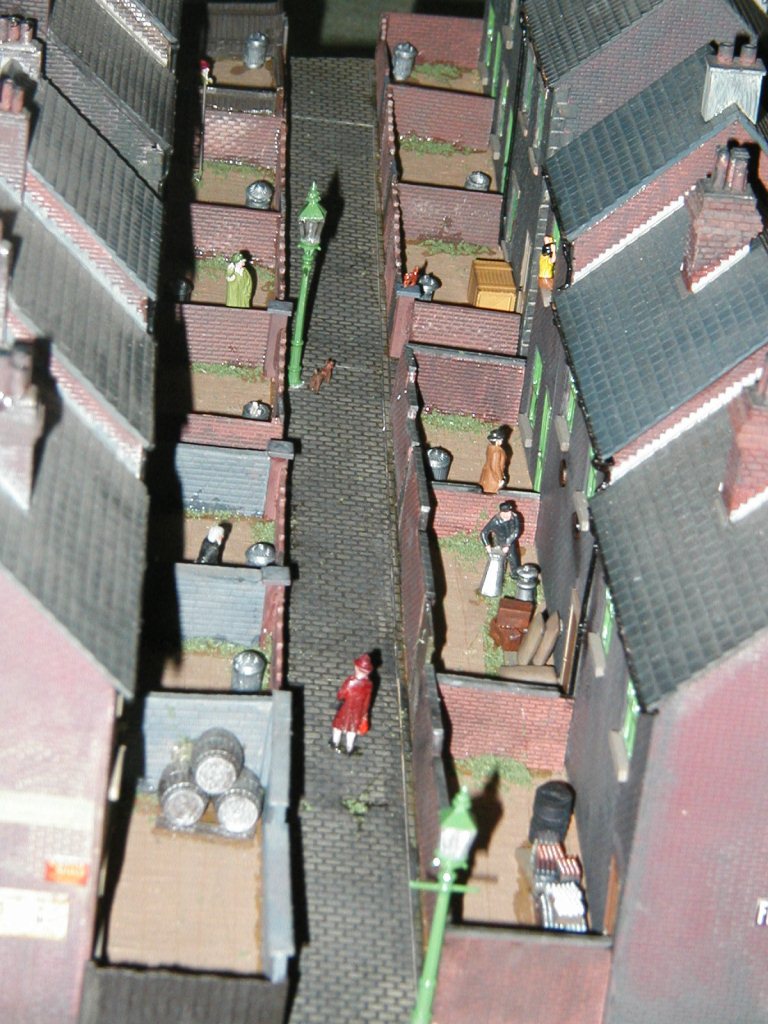
Shot after detailing has been added to the back yards of the parallel rows of houses, including the first of some gas lamps on the layout. (>>)

While in 'detailing mood' I decided to re-visit the shops and houses board. Here a long-planned wall, railings and people finish off the front. The awning still works on Peabody's shop and amazes people who see it being extended or retracted. (>>)
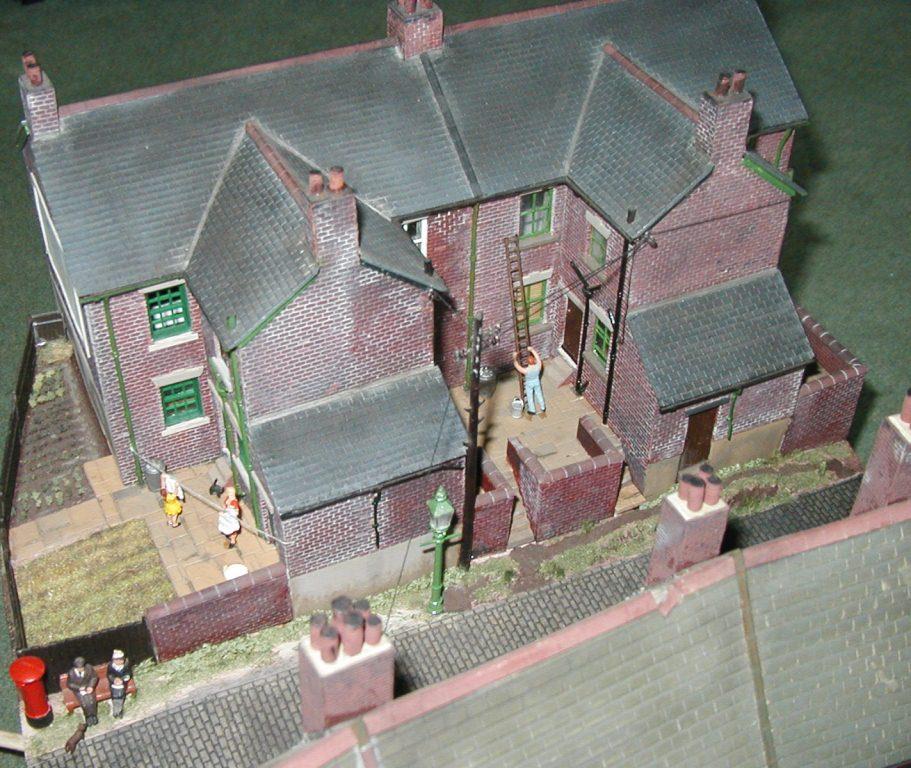
And behind the shops in the block of four houses, there is a mother and daughter hanging out the washing while next door has the window cleaner in. (>>)
After the 2013 Huddersfield exhibition I vowed to get on with motorising more road points (only Boards 5 & 6 had been done). This was because I had two operators controlling the trains while I did the buses and trolleybuses. They got in the way of me manually operating the road points on Board 3, which is the most complex, being the town centre.
I have had the point motors and DCC decoder kits in stock for a long time, so I've got on with it now. To the right are pictures of this difficult process (which is why I haven't done it before), squeezing these into the narrow space under the roads but above the railway.
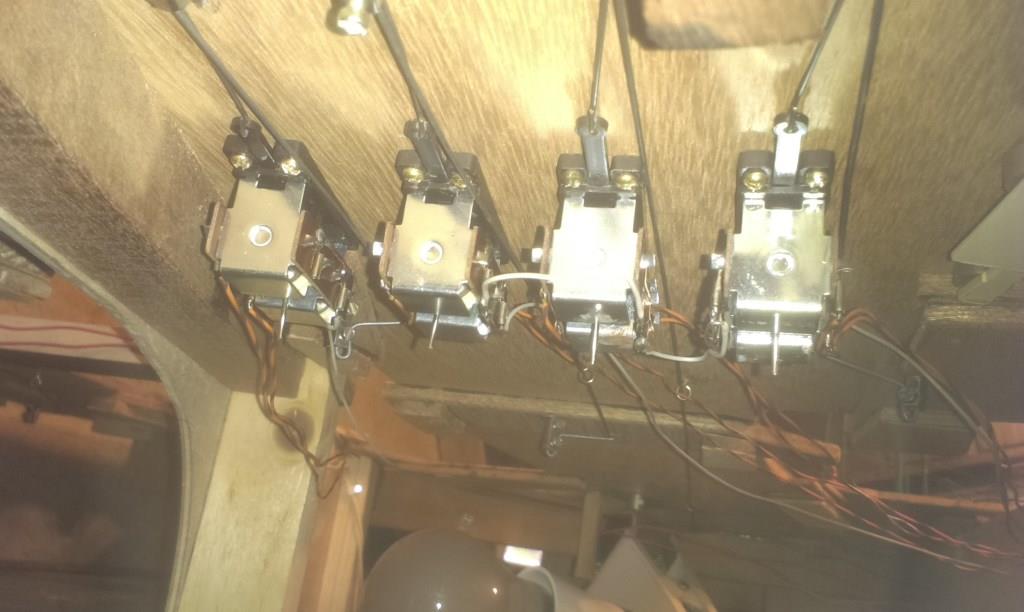
The 'middle' four point motors added and connected to the respective manual rods, which I am leaving in place. The electrical connecting wires running off the back will go to the decoders when I've built them from the MERG kits as for Boards 5&6 (see extension pages). The lamp is only there to enable me to see! (>>)
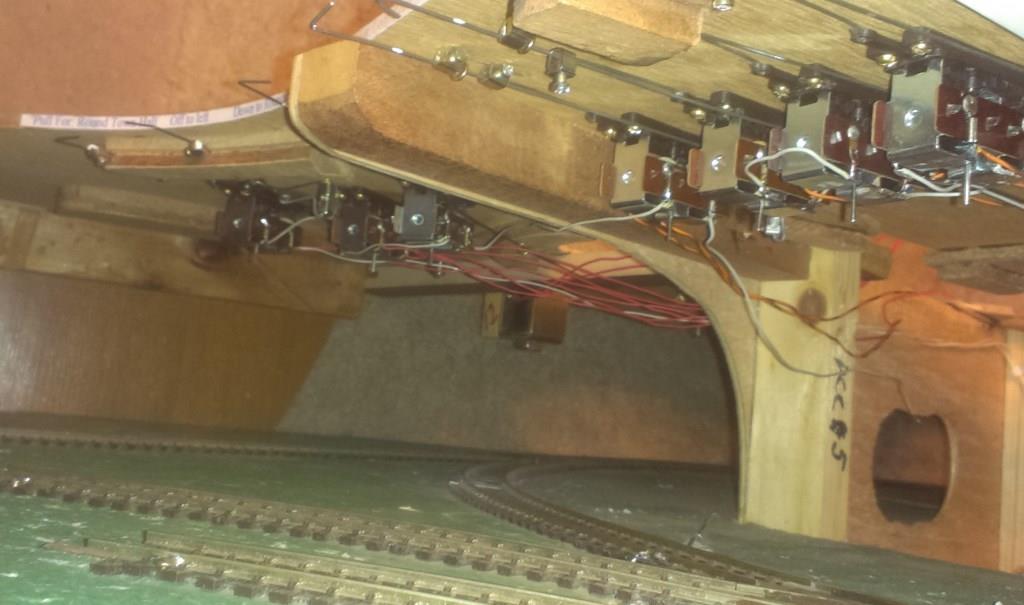
A further view showing the left-hand three point motors fitted beyond the four shown previously. That makes 11 altogether - the other three are spread out to the right of this view. That finishes the point motor installation, so its down to soldering up the decoders and getting them programmed, fitted and wired up. (>>)
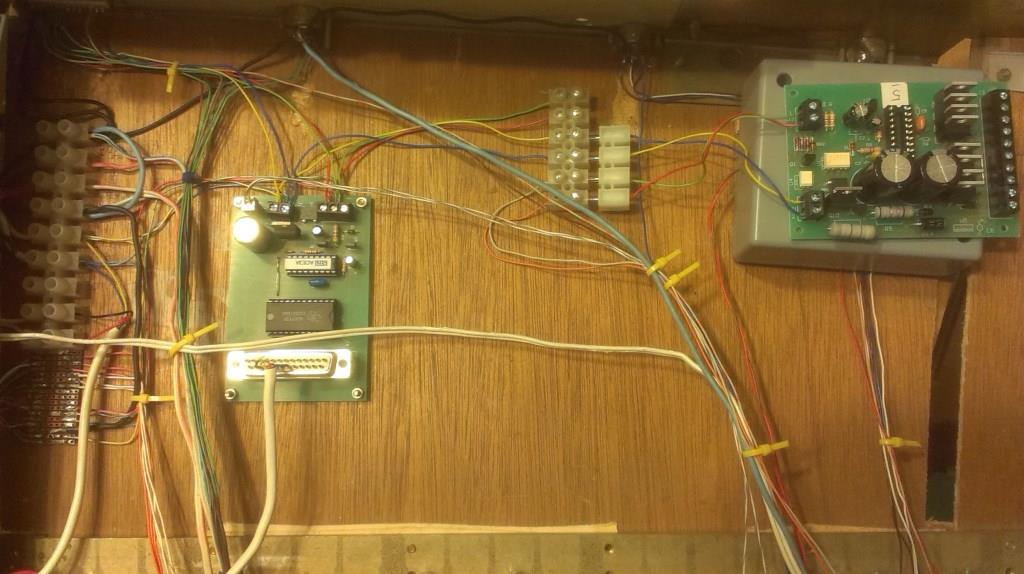
The Encoder (left) in the control panel. By adjusting the plug-in connector, the Decoder (right) can be programmed, or tested from the Encoder. Here is Decoder no.5 being programmed. (>>)
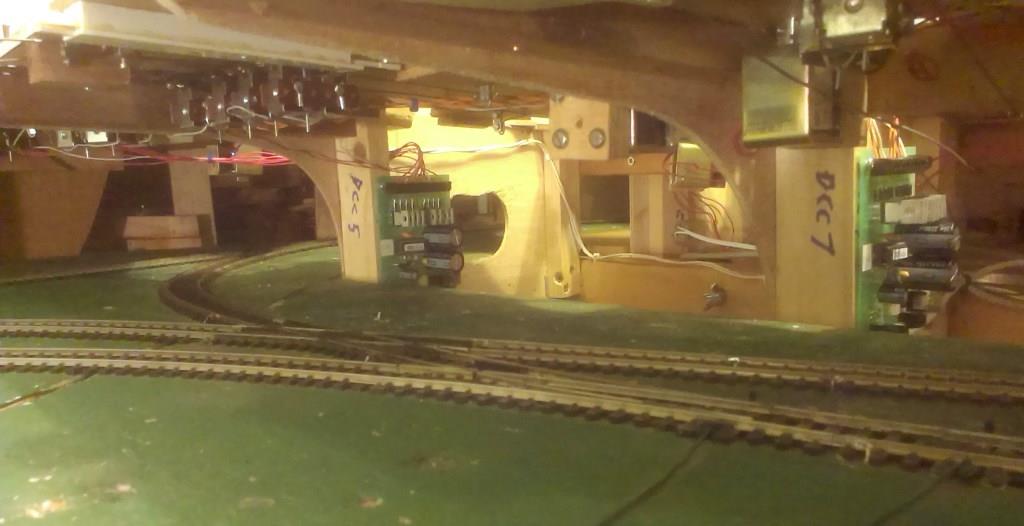
A view under the roadway baseboard showing Decoders 5 and 7 in place and wired up to the point motors. I have just used the odd numbers so I can insert even numbered ones inbetween in future if required. It also makes the panel switch wiring easier. (>>)
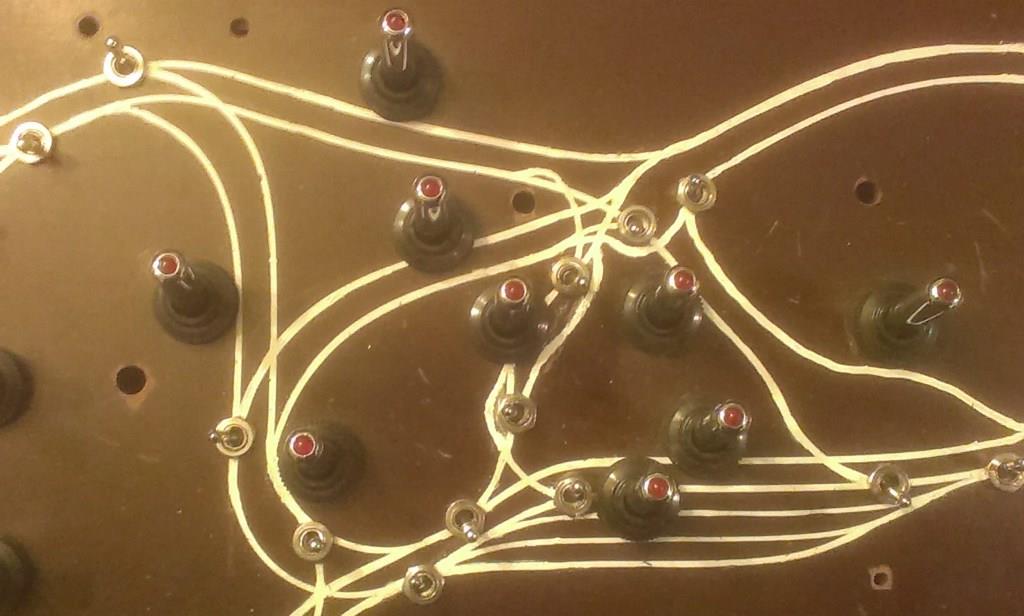
Here is the modified control panel complete with the 11 new switches in the Town Centre to operate the points. These are the small ones, the larger ones are for the bus stop solenoids. (>>)
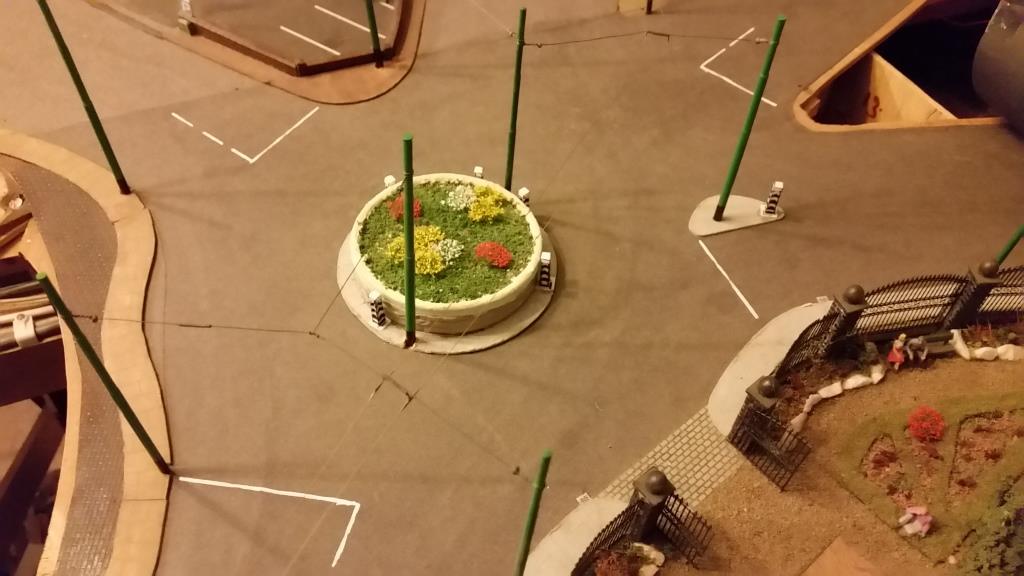
2016/2017 has seen some changes to the layoutbelow. One obvious one is that the roundabout has been finished at last, complete with 3D printed Huddersfield-style 'KEEP LEFT' bollards (>>)
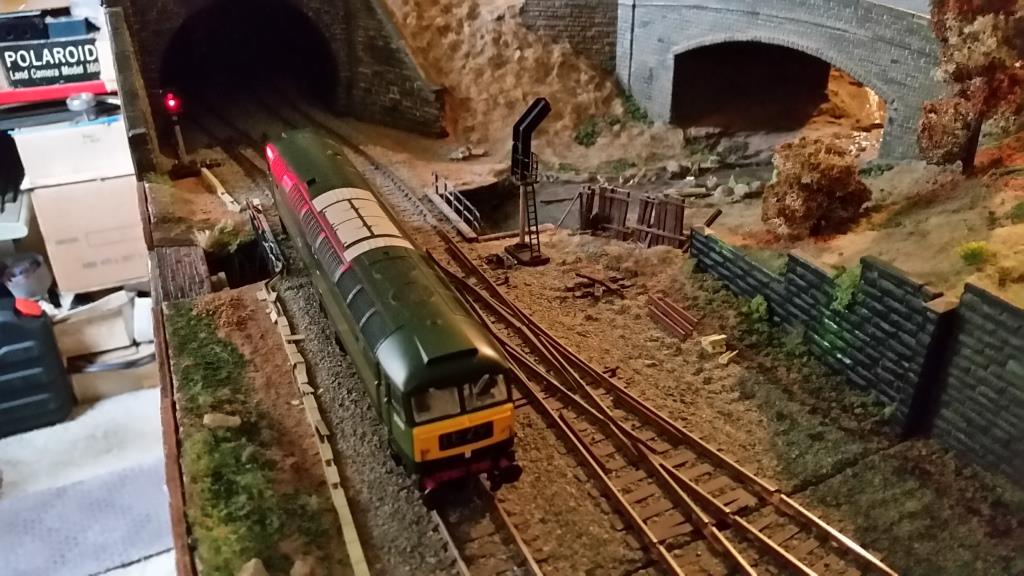
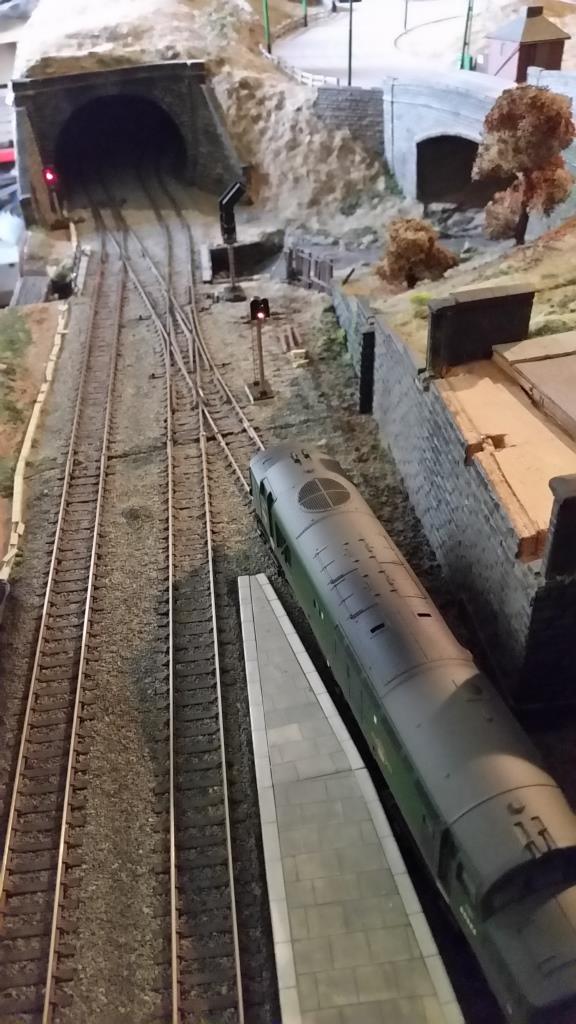
Colour-light signals are appearing on the railway as of 2017. Here D1500 is awaiting release from the station starter signal. (>>)
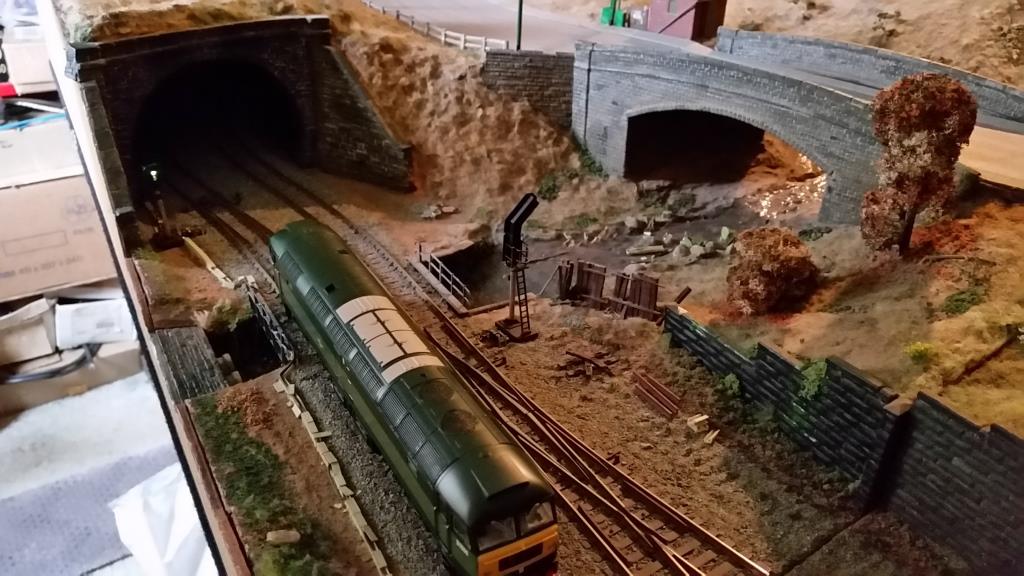
D1500 gets the green light to enter the tunnel. The signal for the opposite direction can also be seen.
(>>)
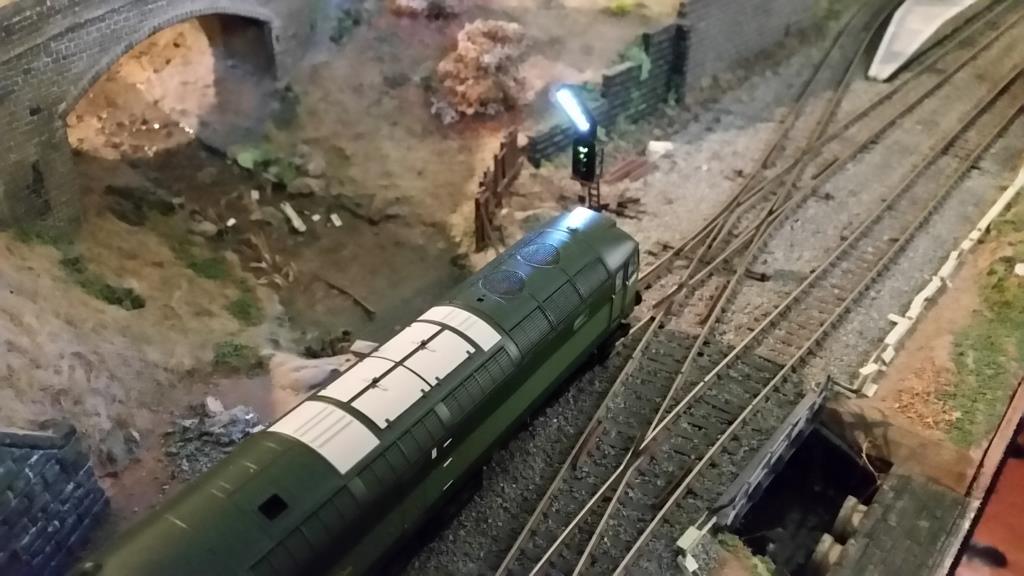
The opposite signal heading in the direction of the station features a 'feather' for the back platform road. (>>)
On the right is D6984 waiting at the newly installed starter signal on the back platform road. (>>)
And on the far right, the same loco is stopped at the new starter signal for the opposite direction. The starter for the Branch off the main line is also at red. Just to the left of the signal box there is a junction signal for trains coming out of the tunnel. In front of the signal box is the starter signal for the main line (on green), and to the right of that, just visible, is the incoming signal for the opposite main line. (>>)